After seeing quite a few issues appearing with people trying to get started with the recent Windows version of the TWM GUI Wallet, I can tell you, the issue is Windows, in its many different OS configurations, and associated AntiVirus softwares, which are causing the problems.
Basically, Windows sucks! 
So, to begin, BEFORE you even download the installation file, turn off your AV software.
Then download and install the TWMwallet.
Now, you need to whitelist the installation folder…
Find the shortcut to the program on your desktop and navigate thru to the installation folder…
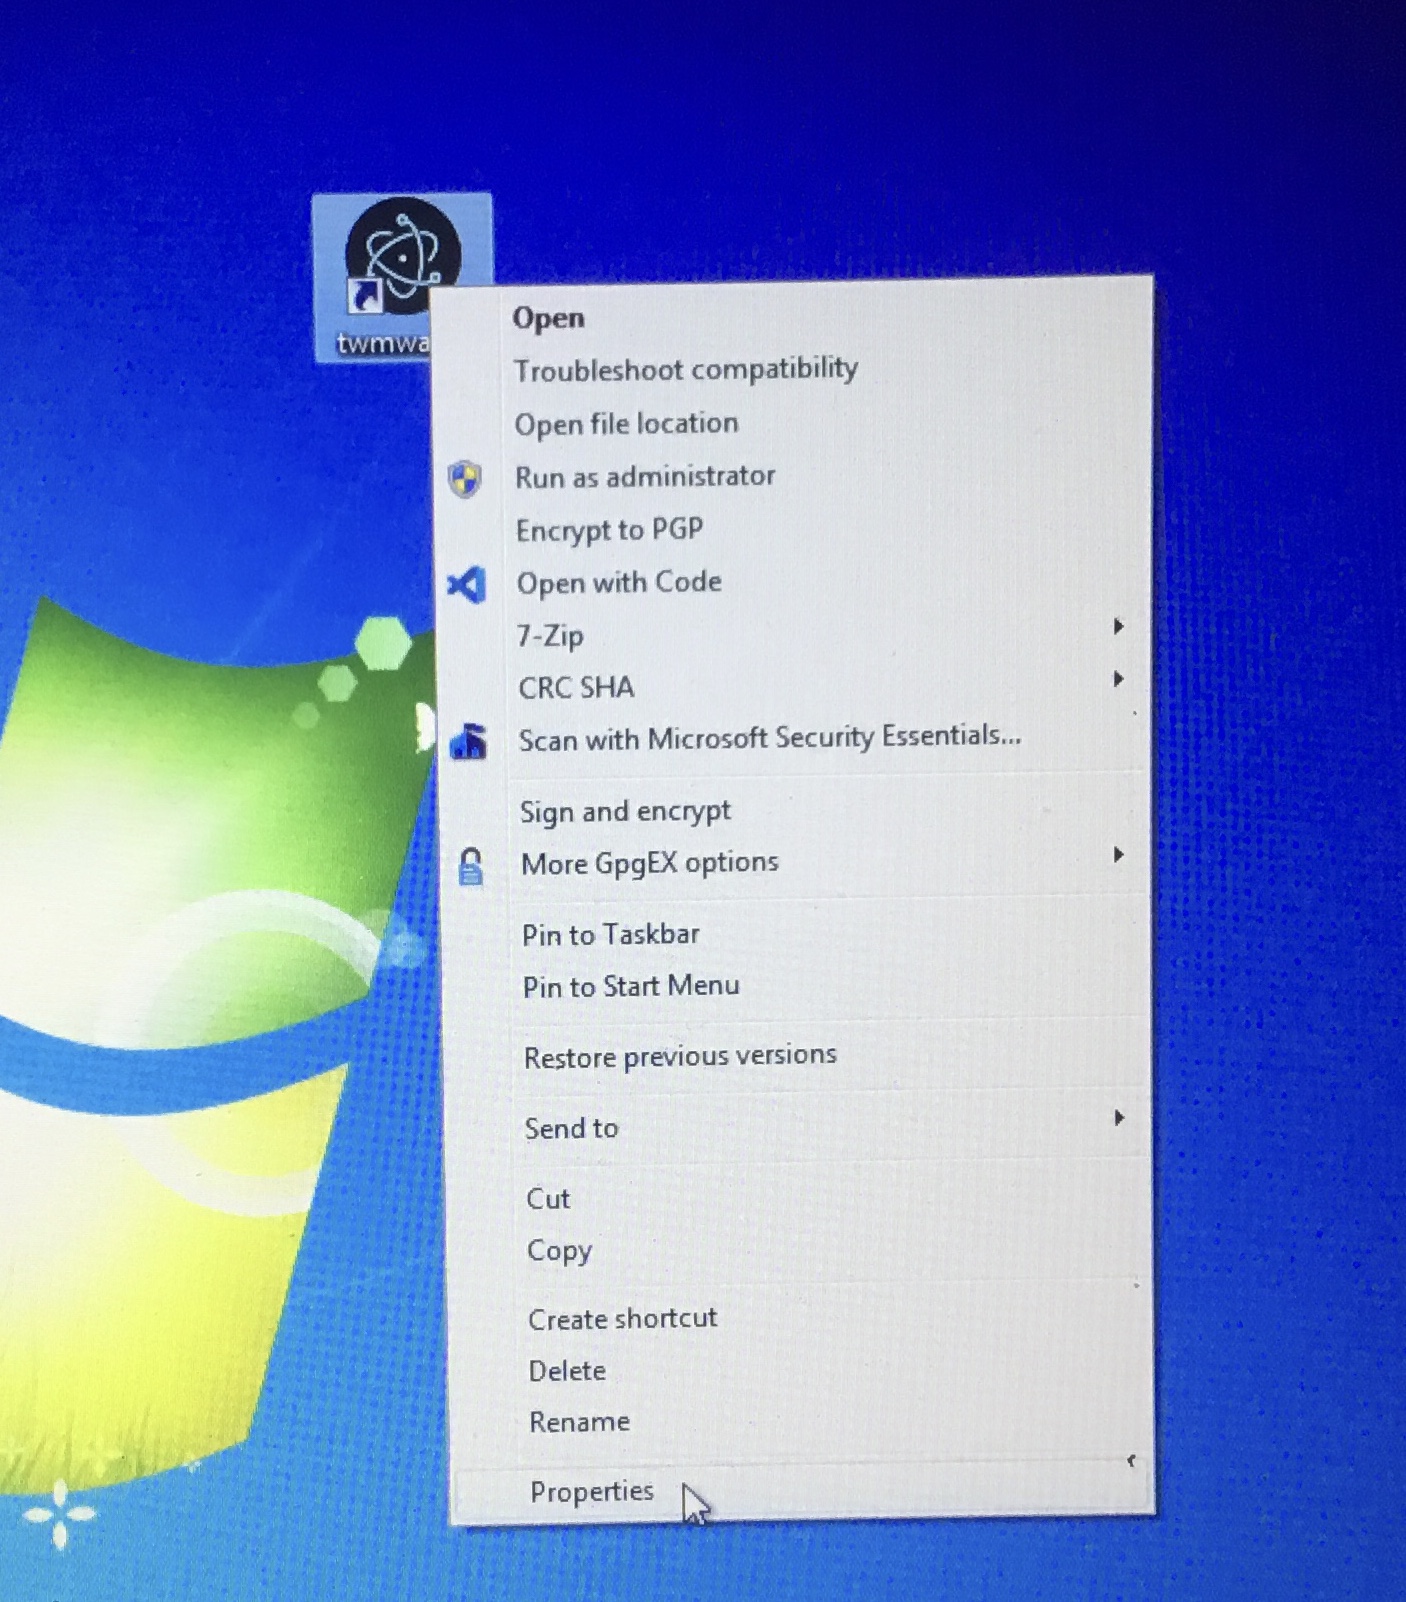
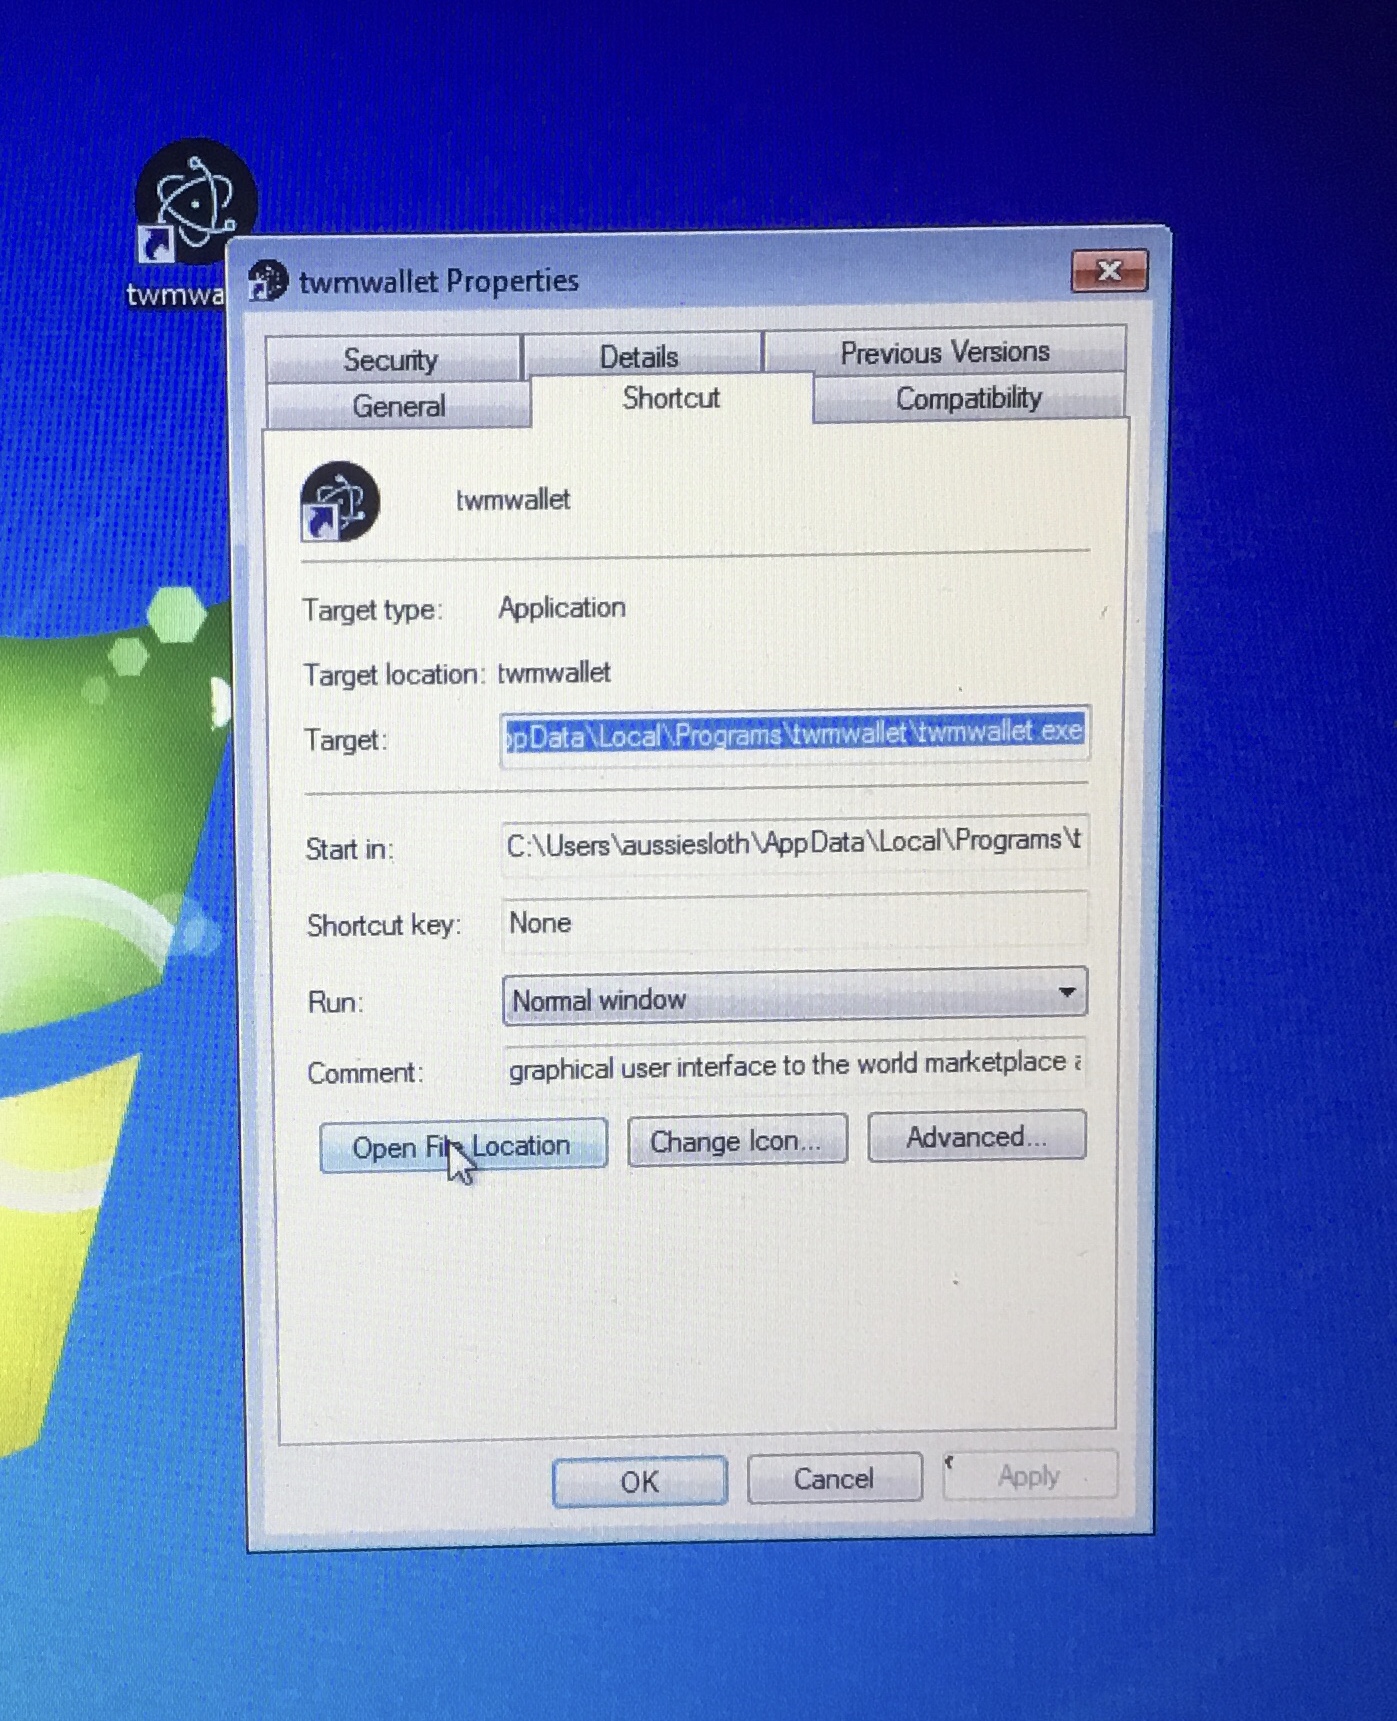
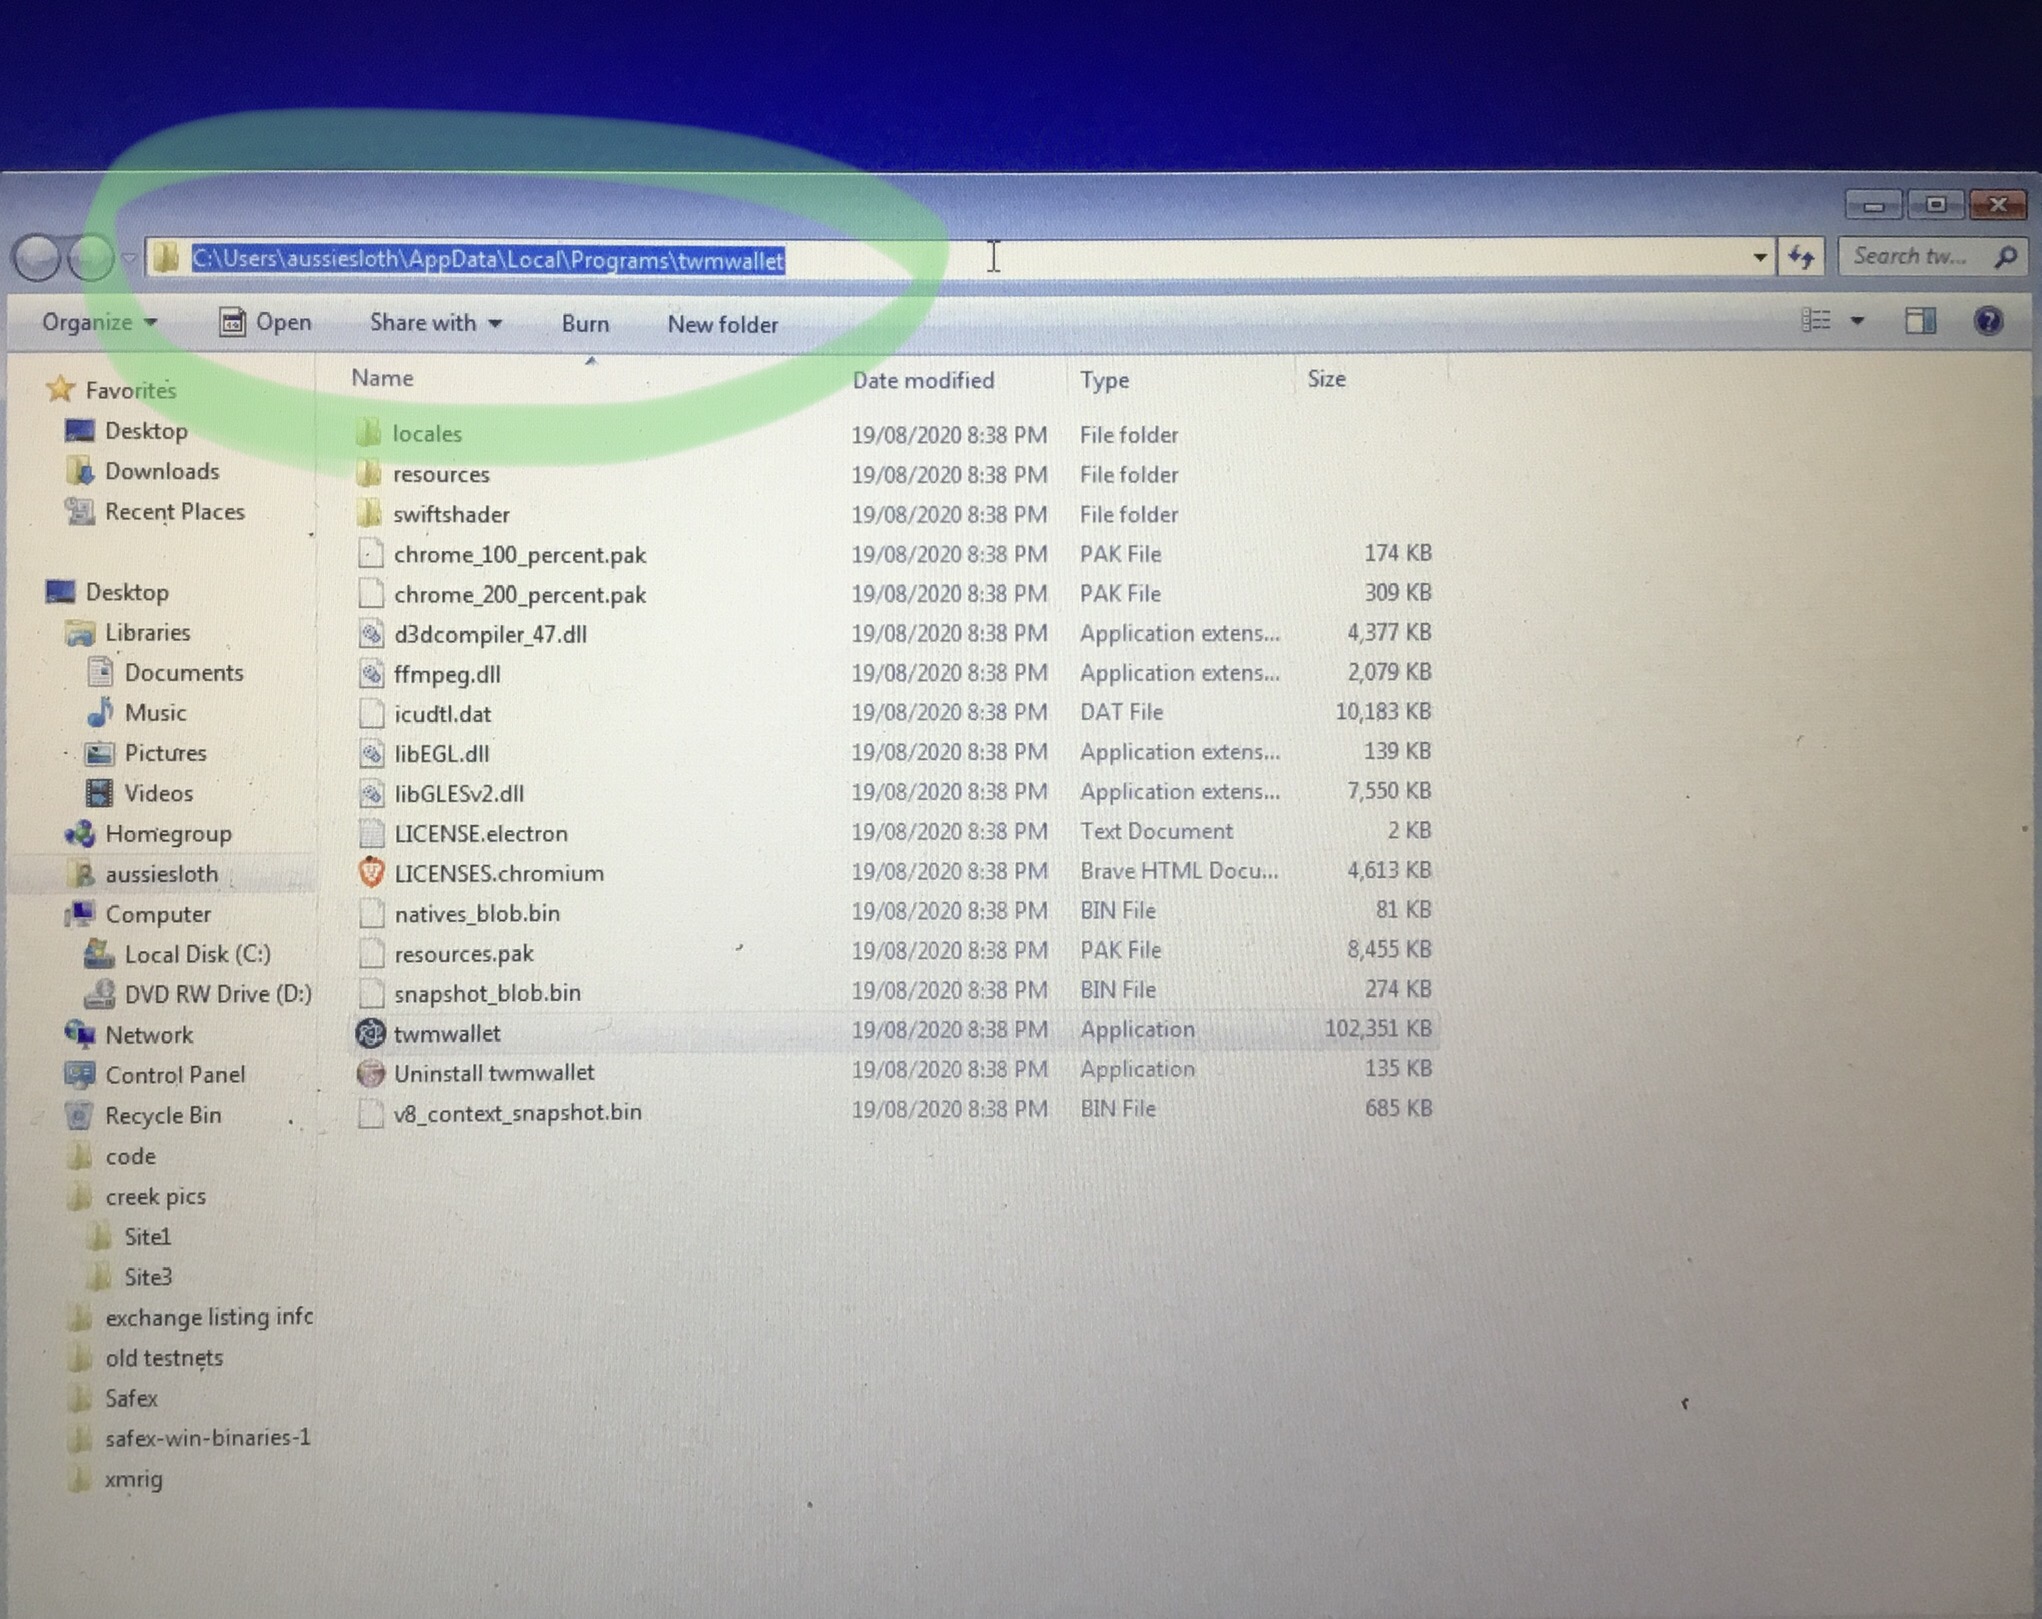
Copy the folder path into your Antivirus software as an exclusion/whitelist.
Now, you can enable your antivirus again.
Next, we need to tell the wallet software to run in Admin mode.
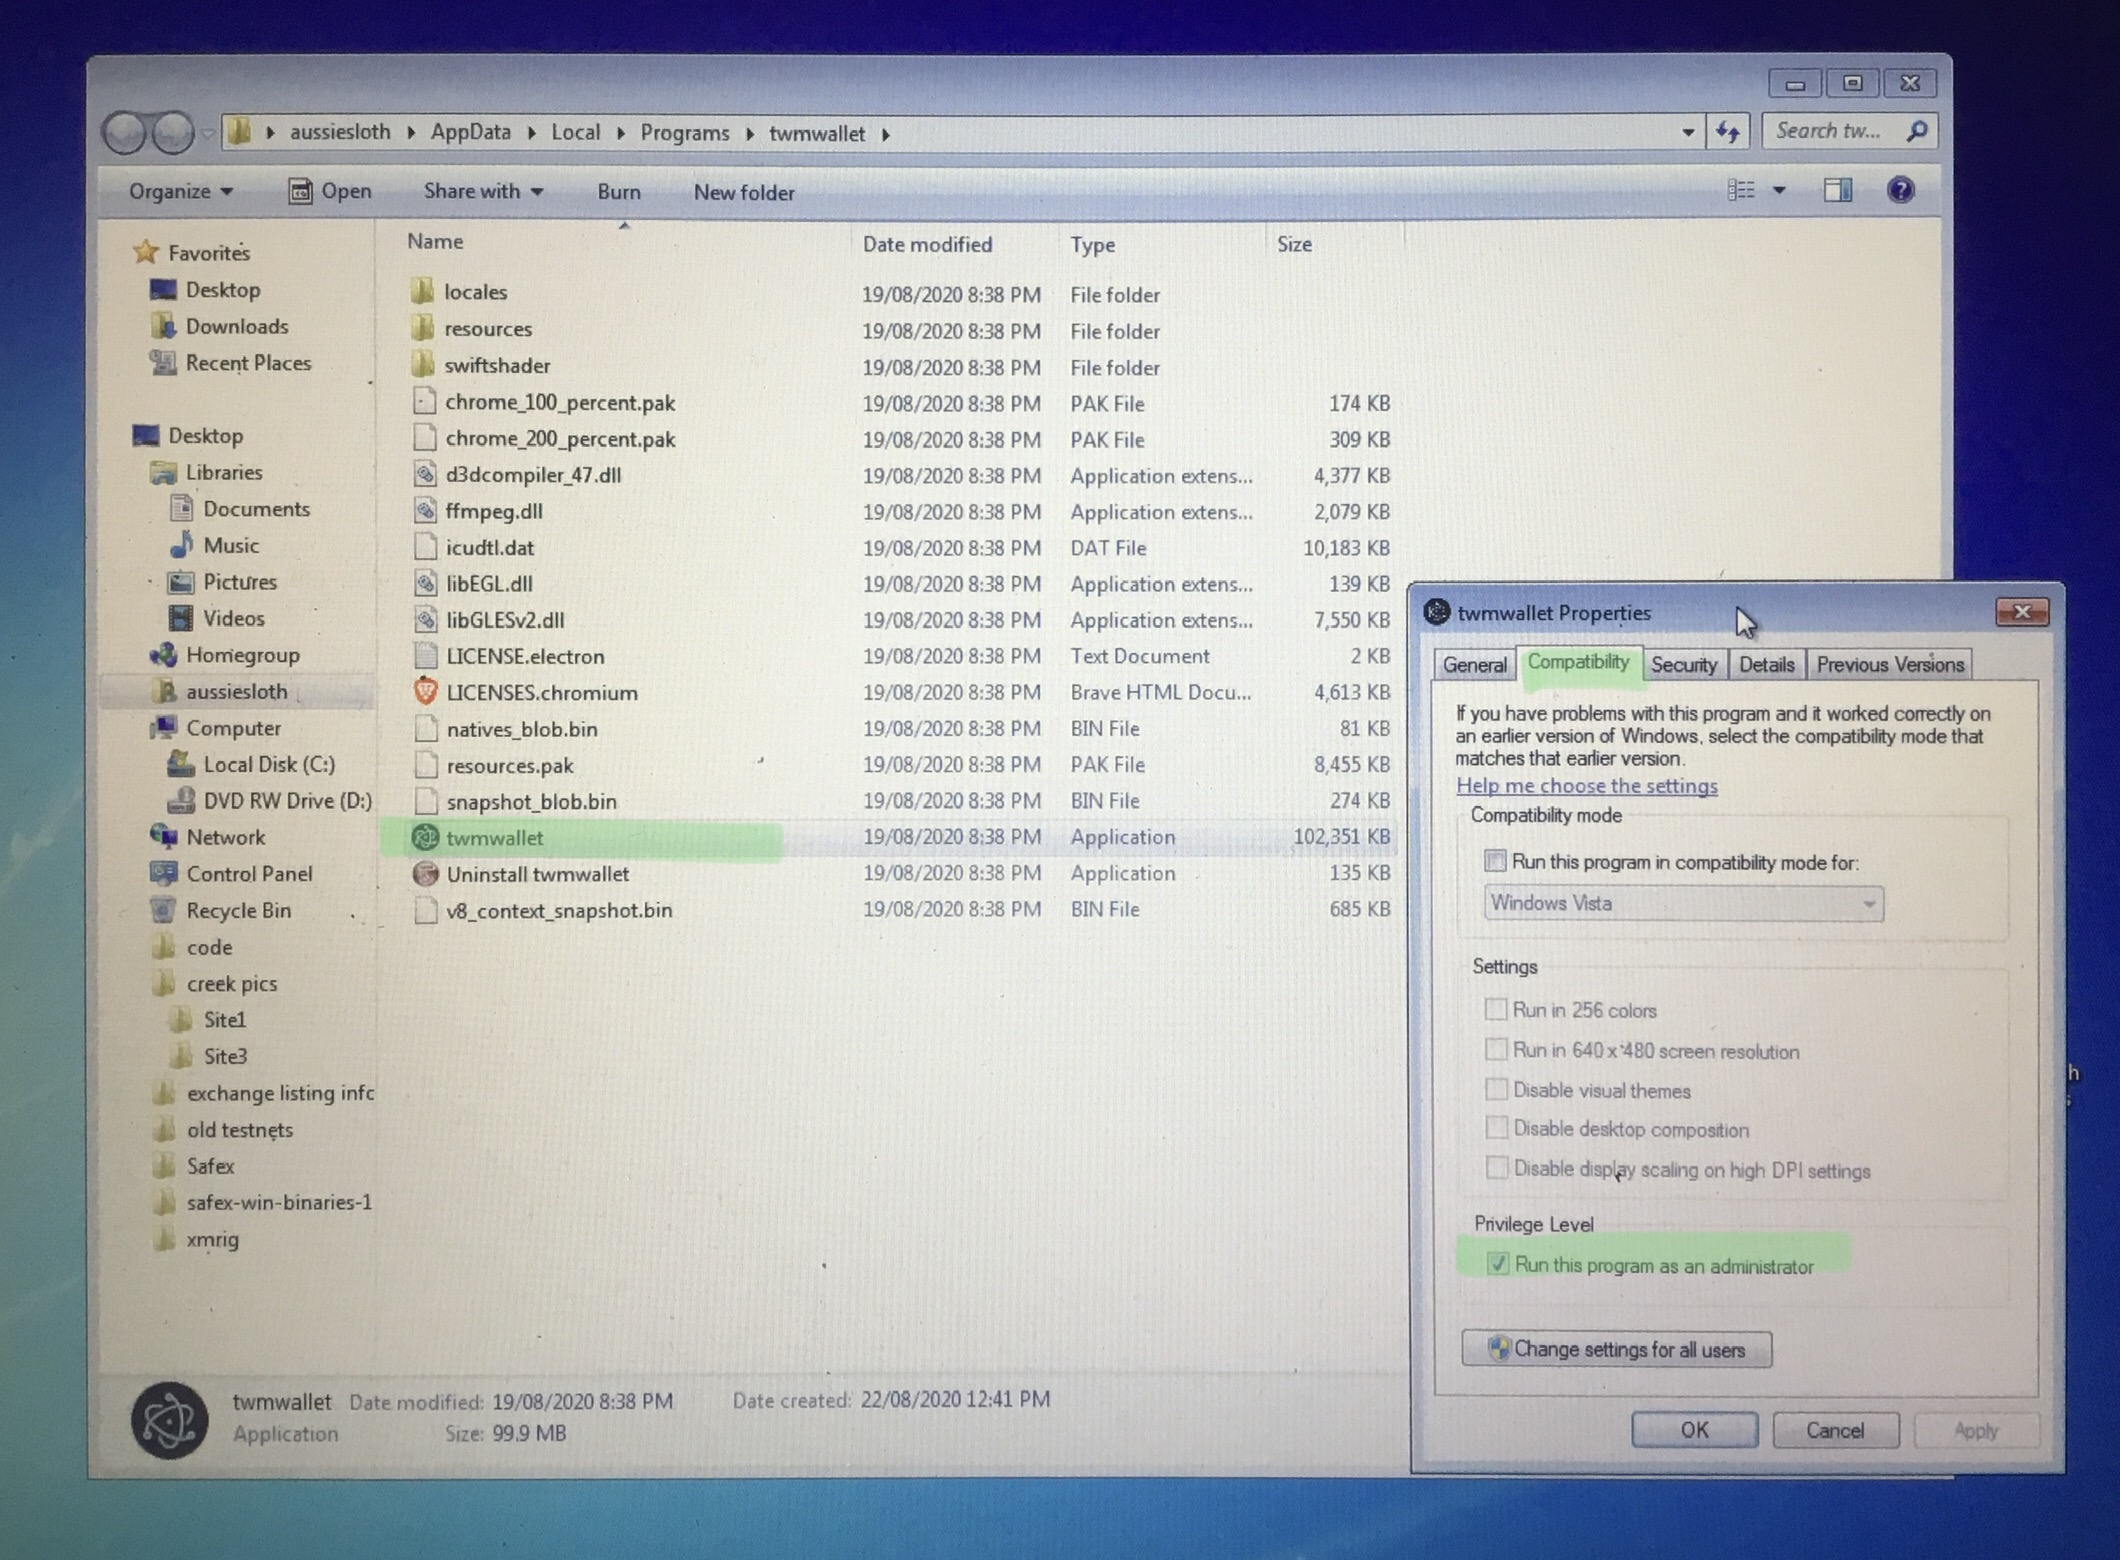
While still in the installation folder window, right click on the twmwallet application file, select properties, then in the properties window, click the Compatibility tab and tick the checkbox for Privilege Level, then Apply and OK.
Close the window and double click the Shortcut on the desktop to run the TWM wallet… you should now get this warning, which signals it will be running in Admin mode…

You’re now ready to create your Stagenet Wallet…
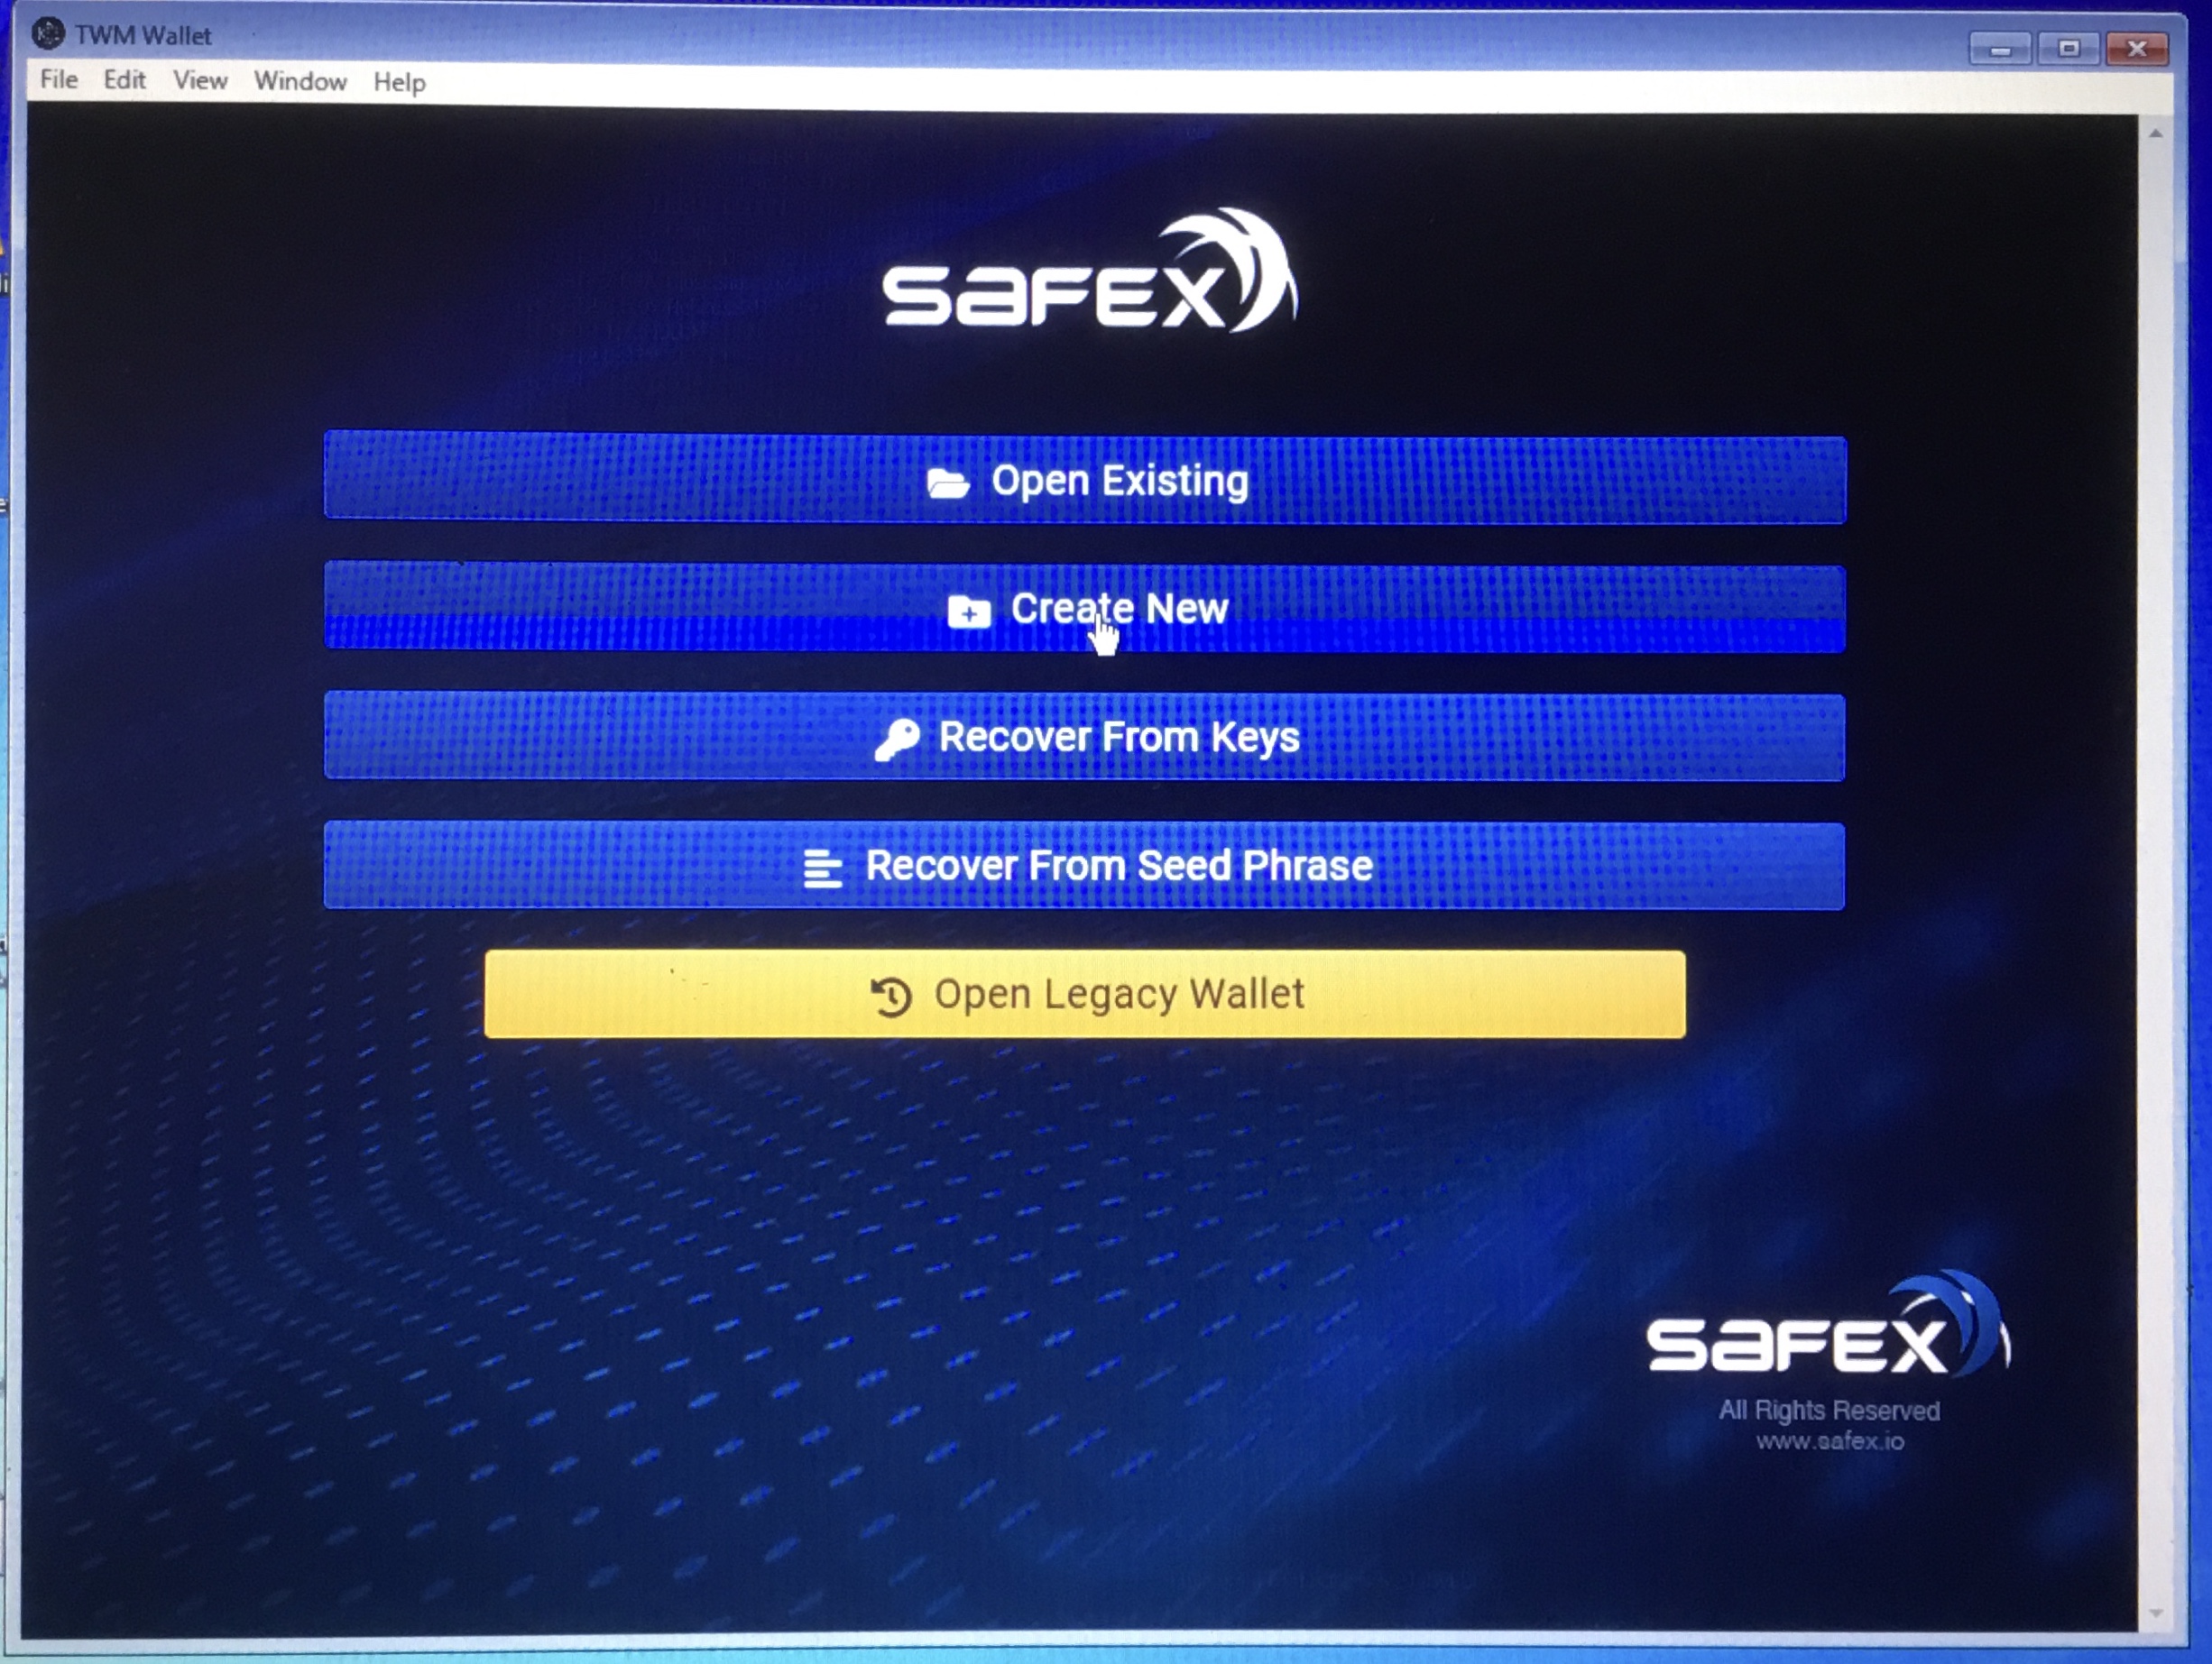
Click Create New
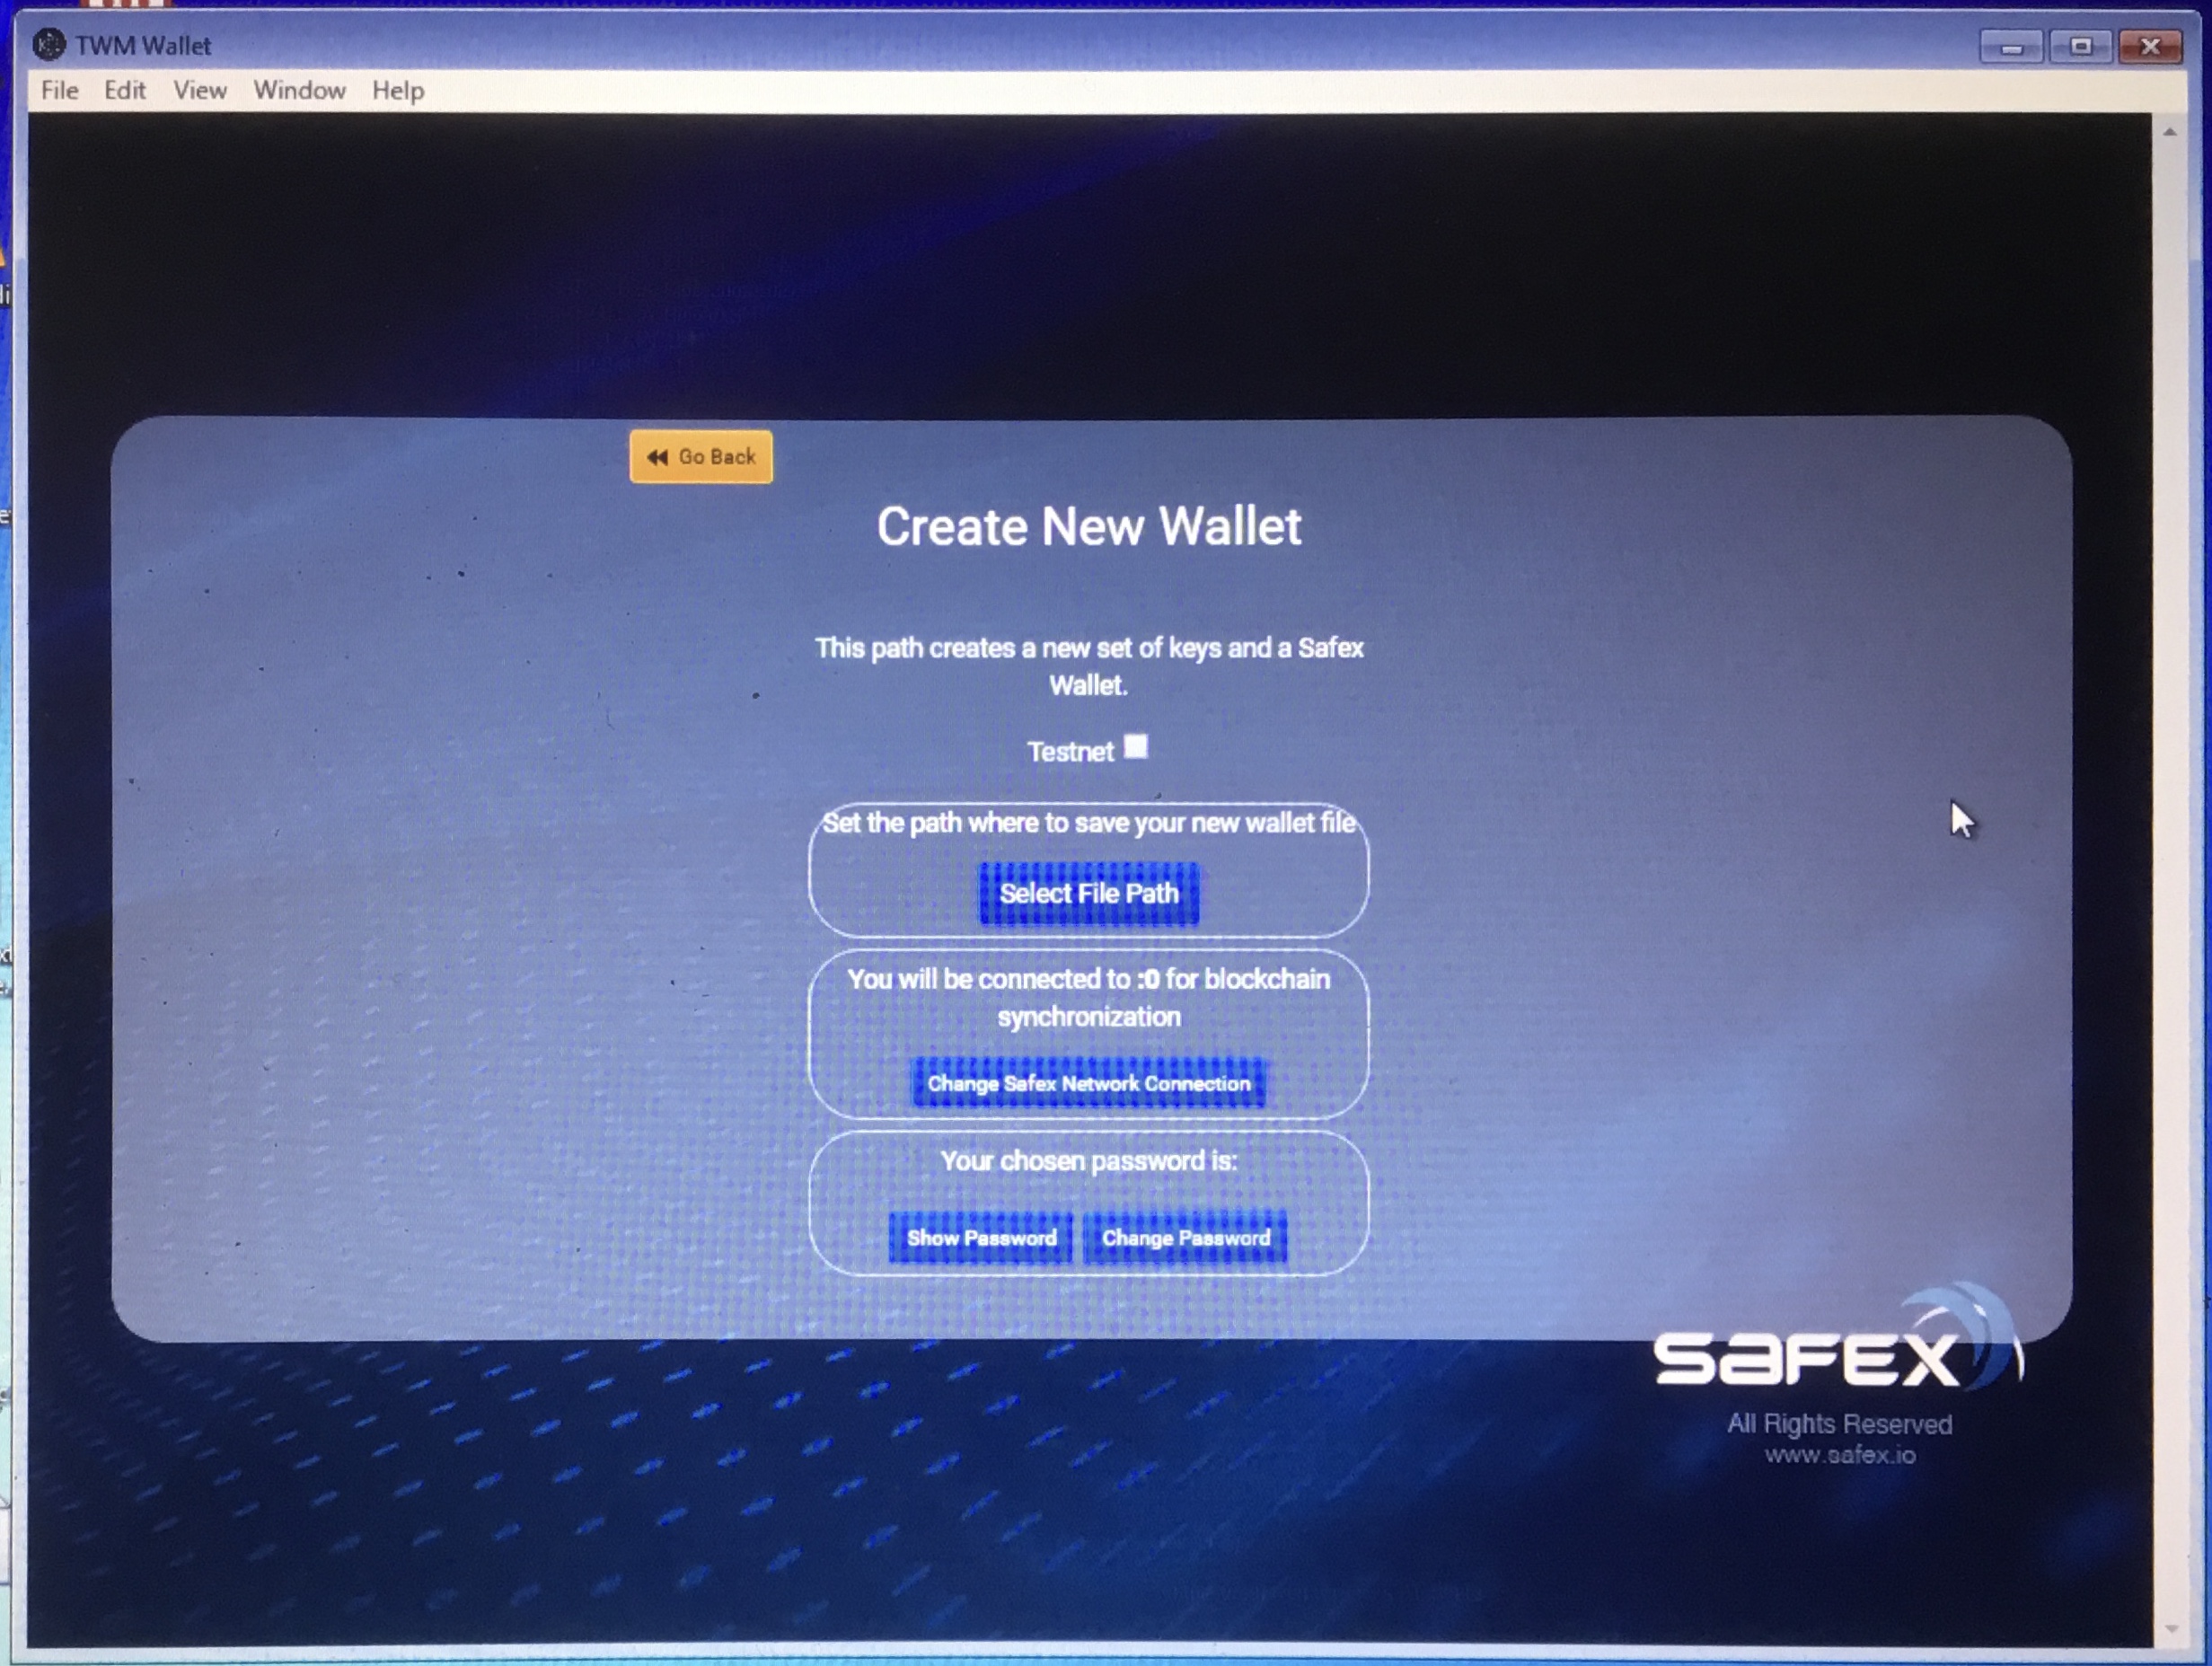
DO NOT click the Testnet checkbox.
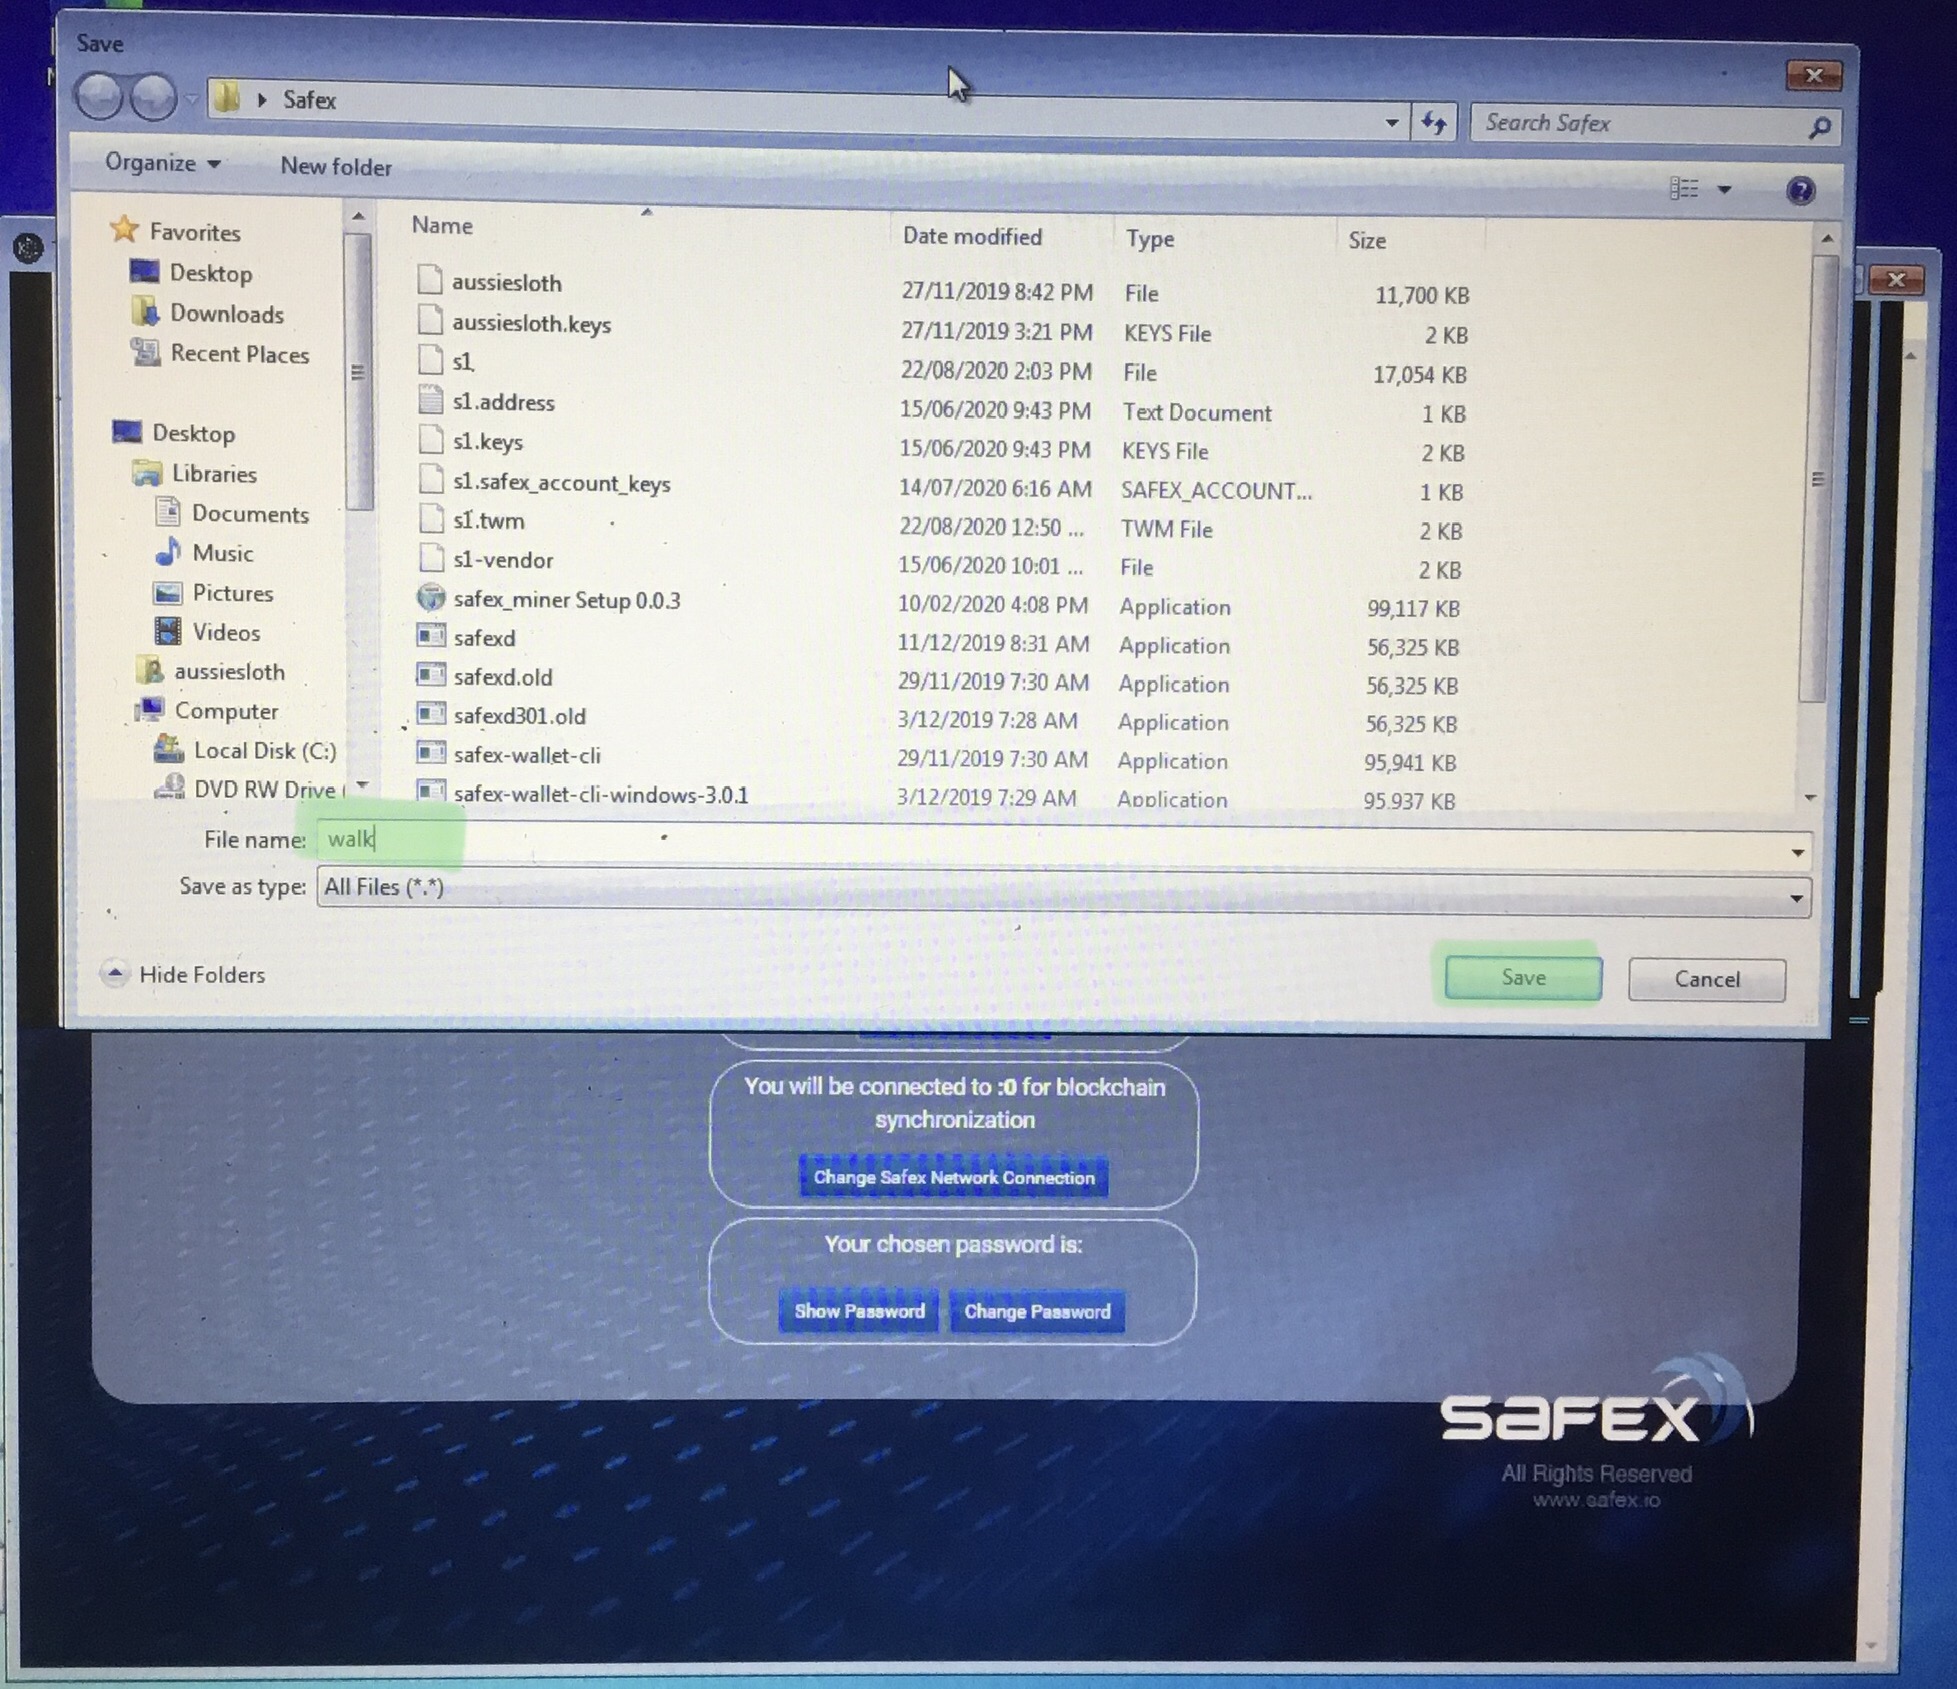
Click Select File Path and name your wallet…
Next you want to enter the connection info for the rpc node you want your wallet to connect with. You can leave it on the default stagenetrpc.safex.org, but depending on where you are in the world, you may experience a lag in some of the wallet screens populating.
The fastest connection method is to a local node, but given this guide is designed to help novices, I’ll omit going through that process.
The other option is to use one of the nodes provided by a member of the testing group at http://safex.ninja/nodes
Just find the closest node to your location and enter the node address. The port does NOT change. For me, I entered the Sydney node address.
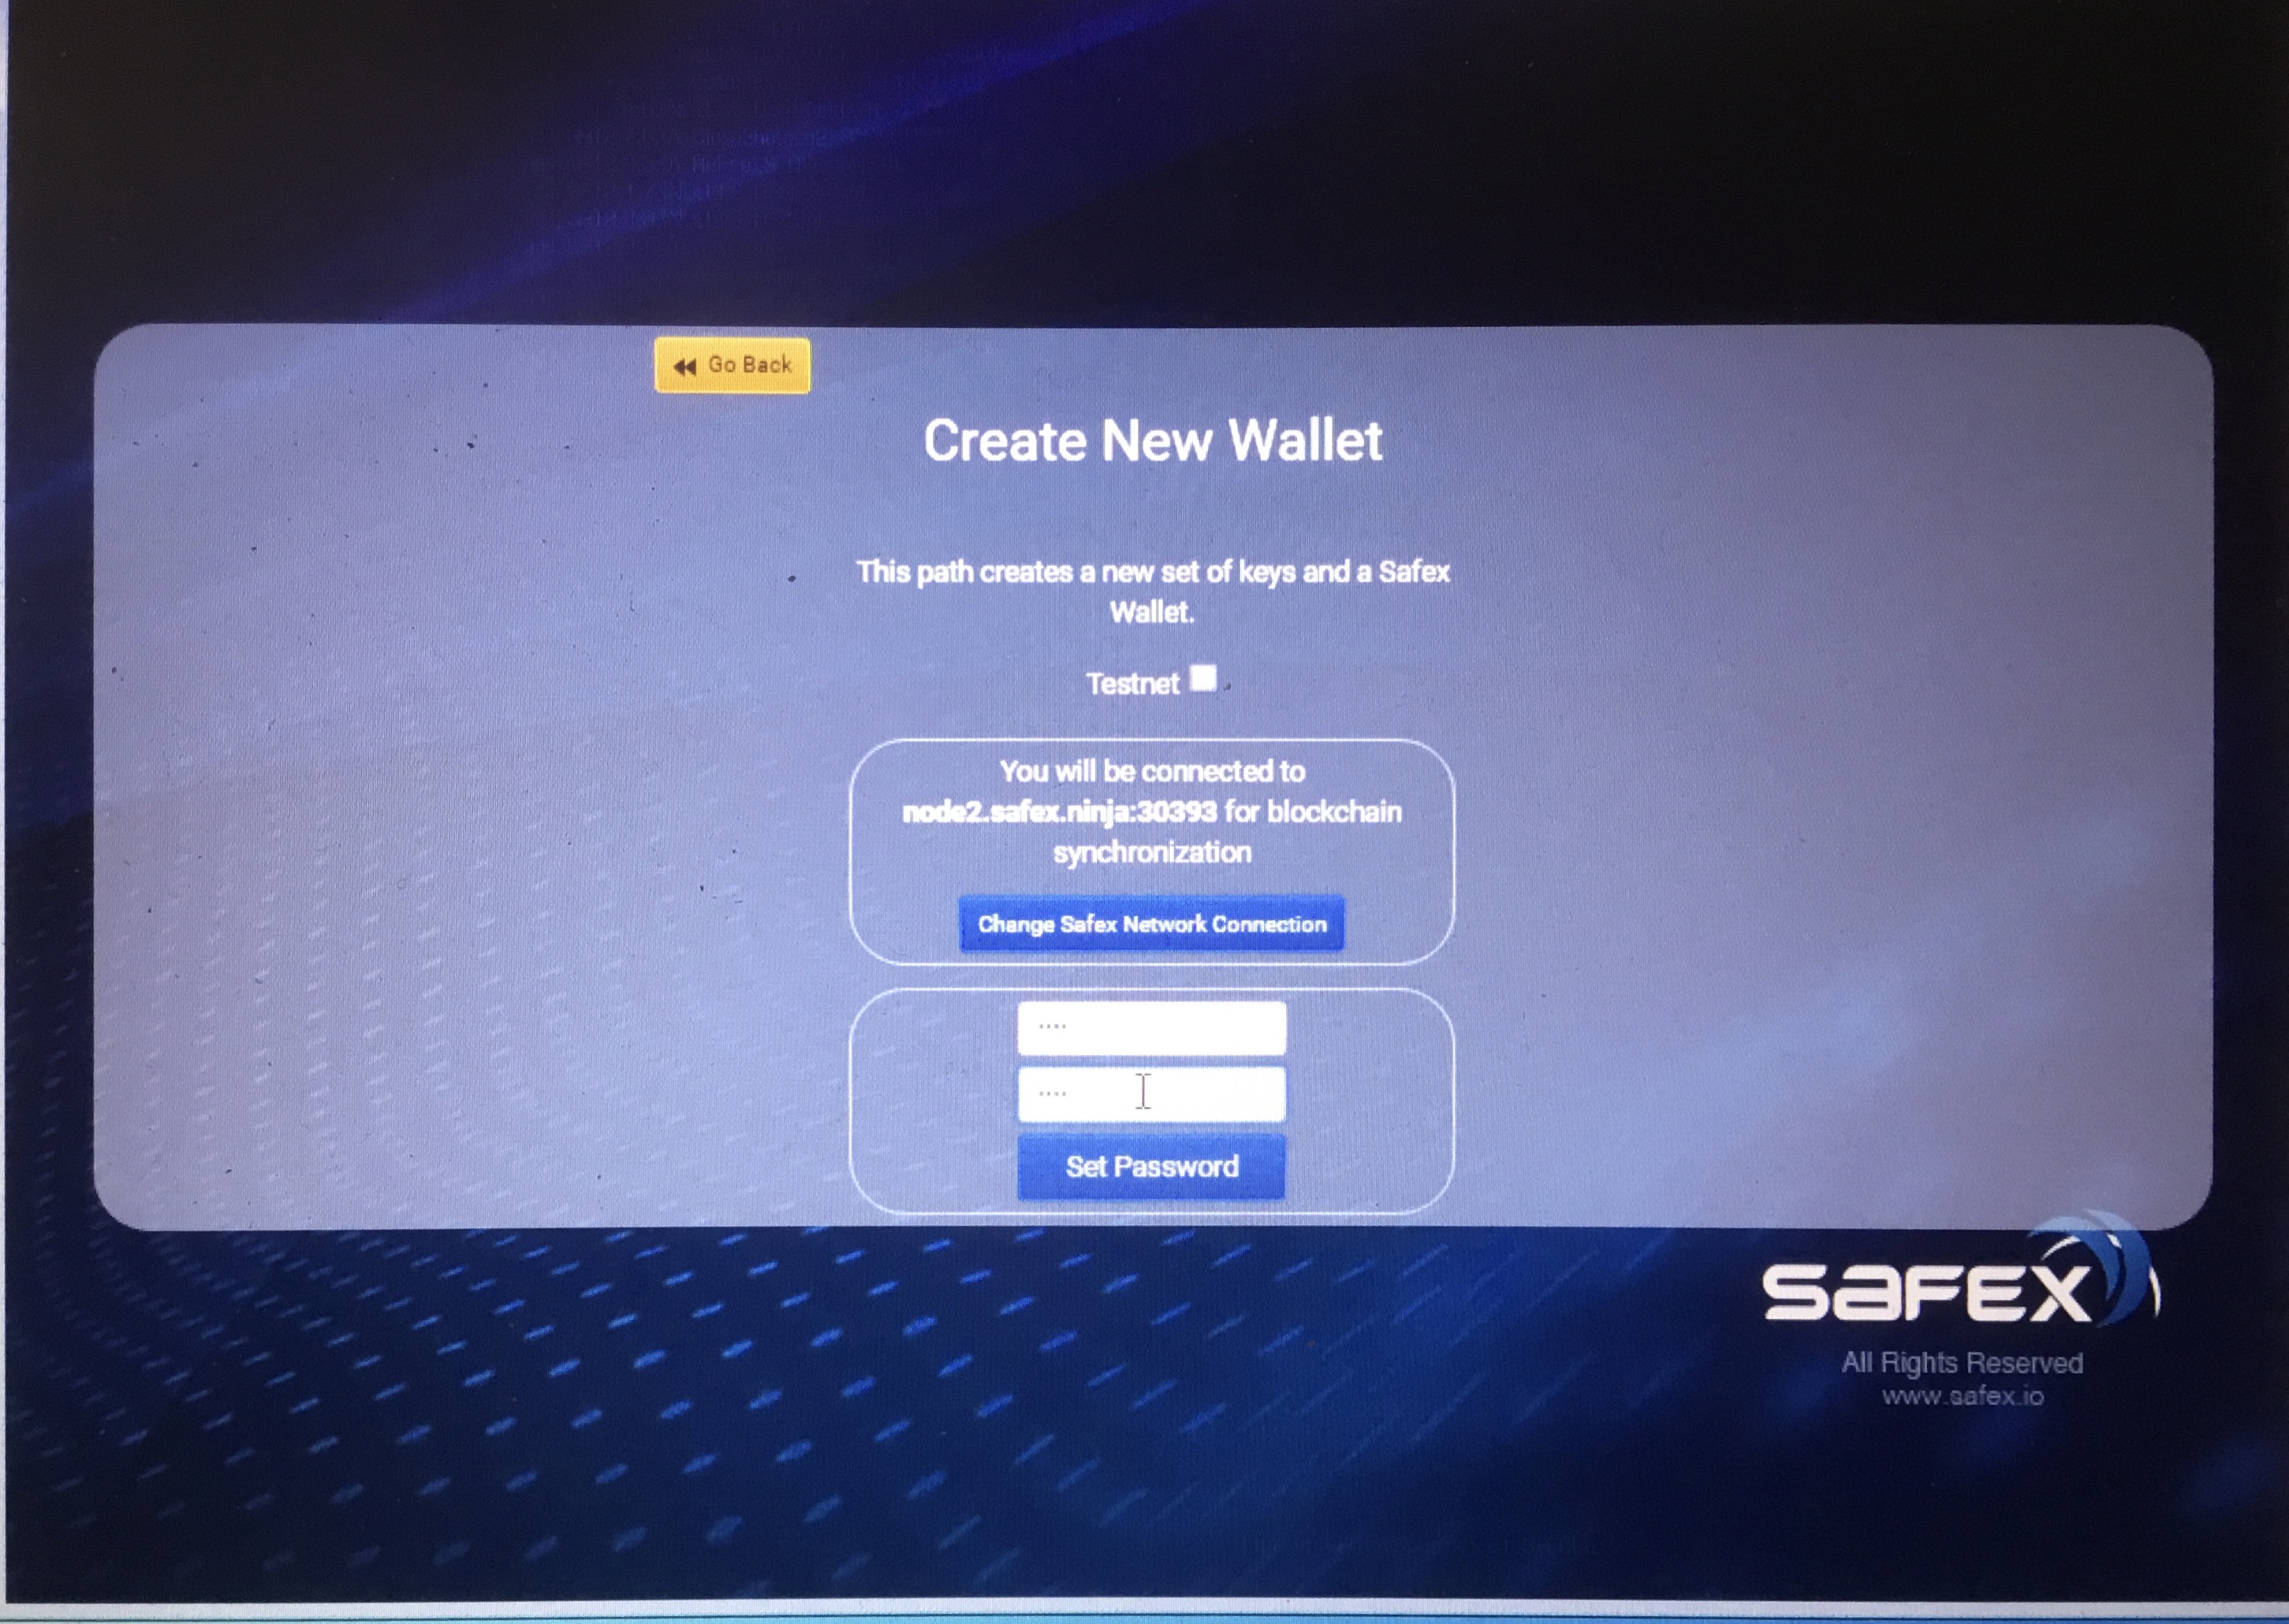
Set the connection.

Enter your password… then Set Password.
Create New Wallet…
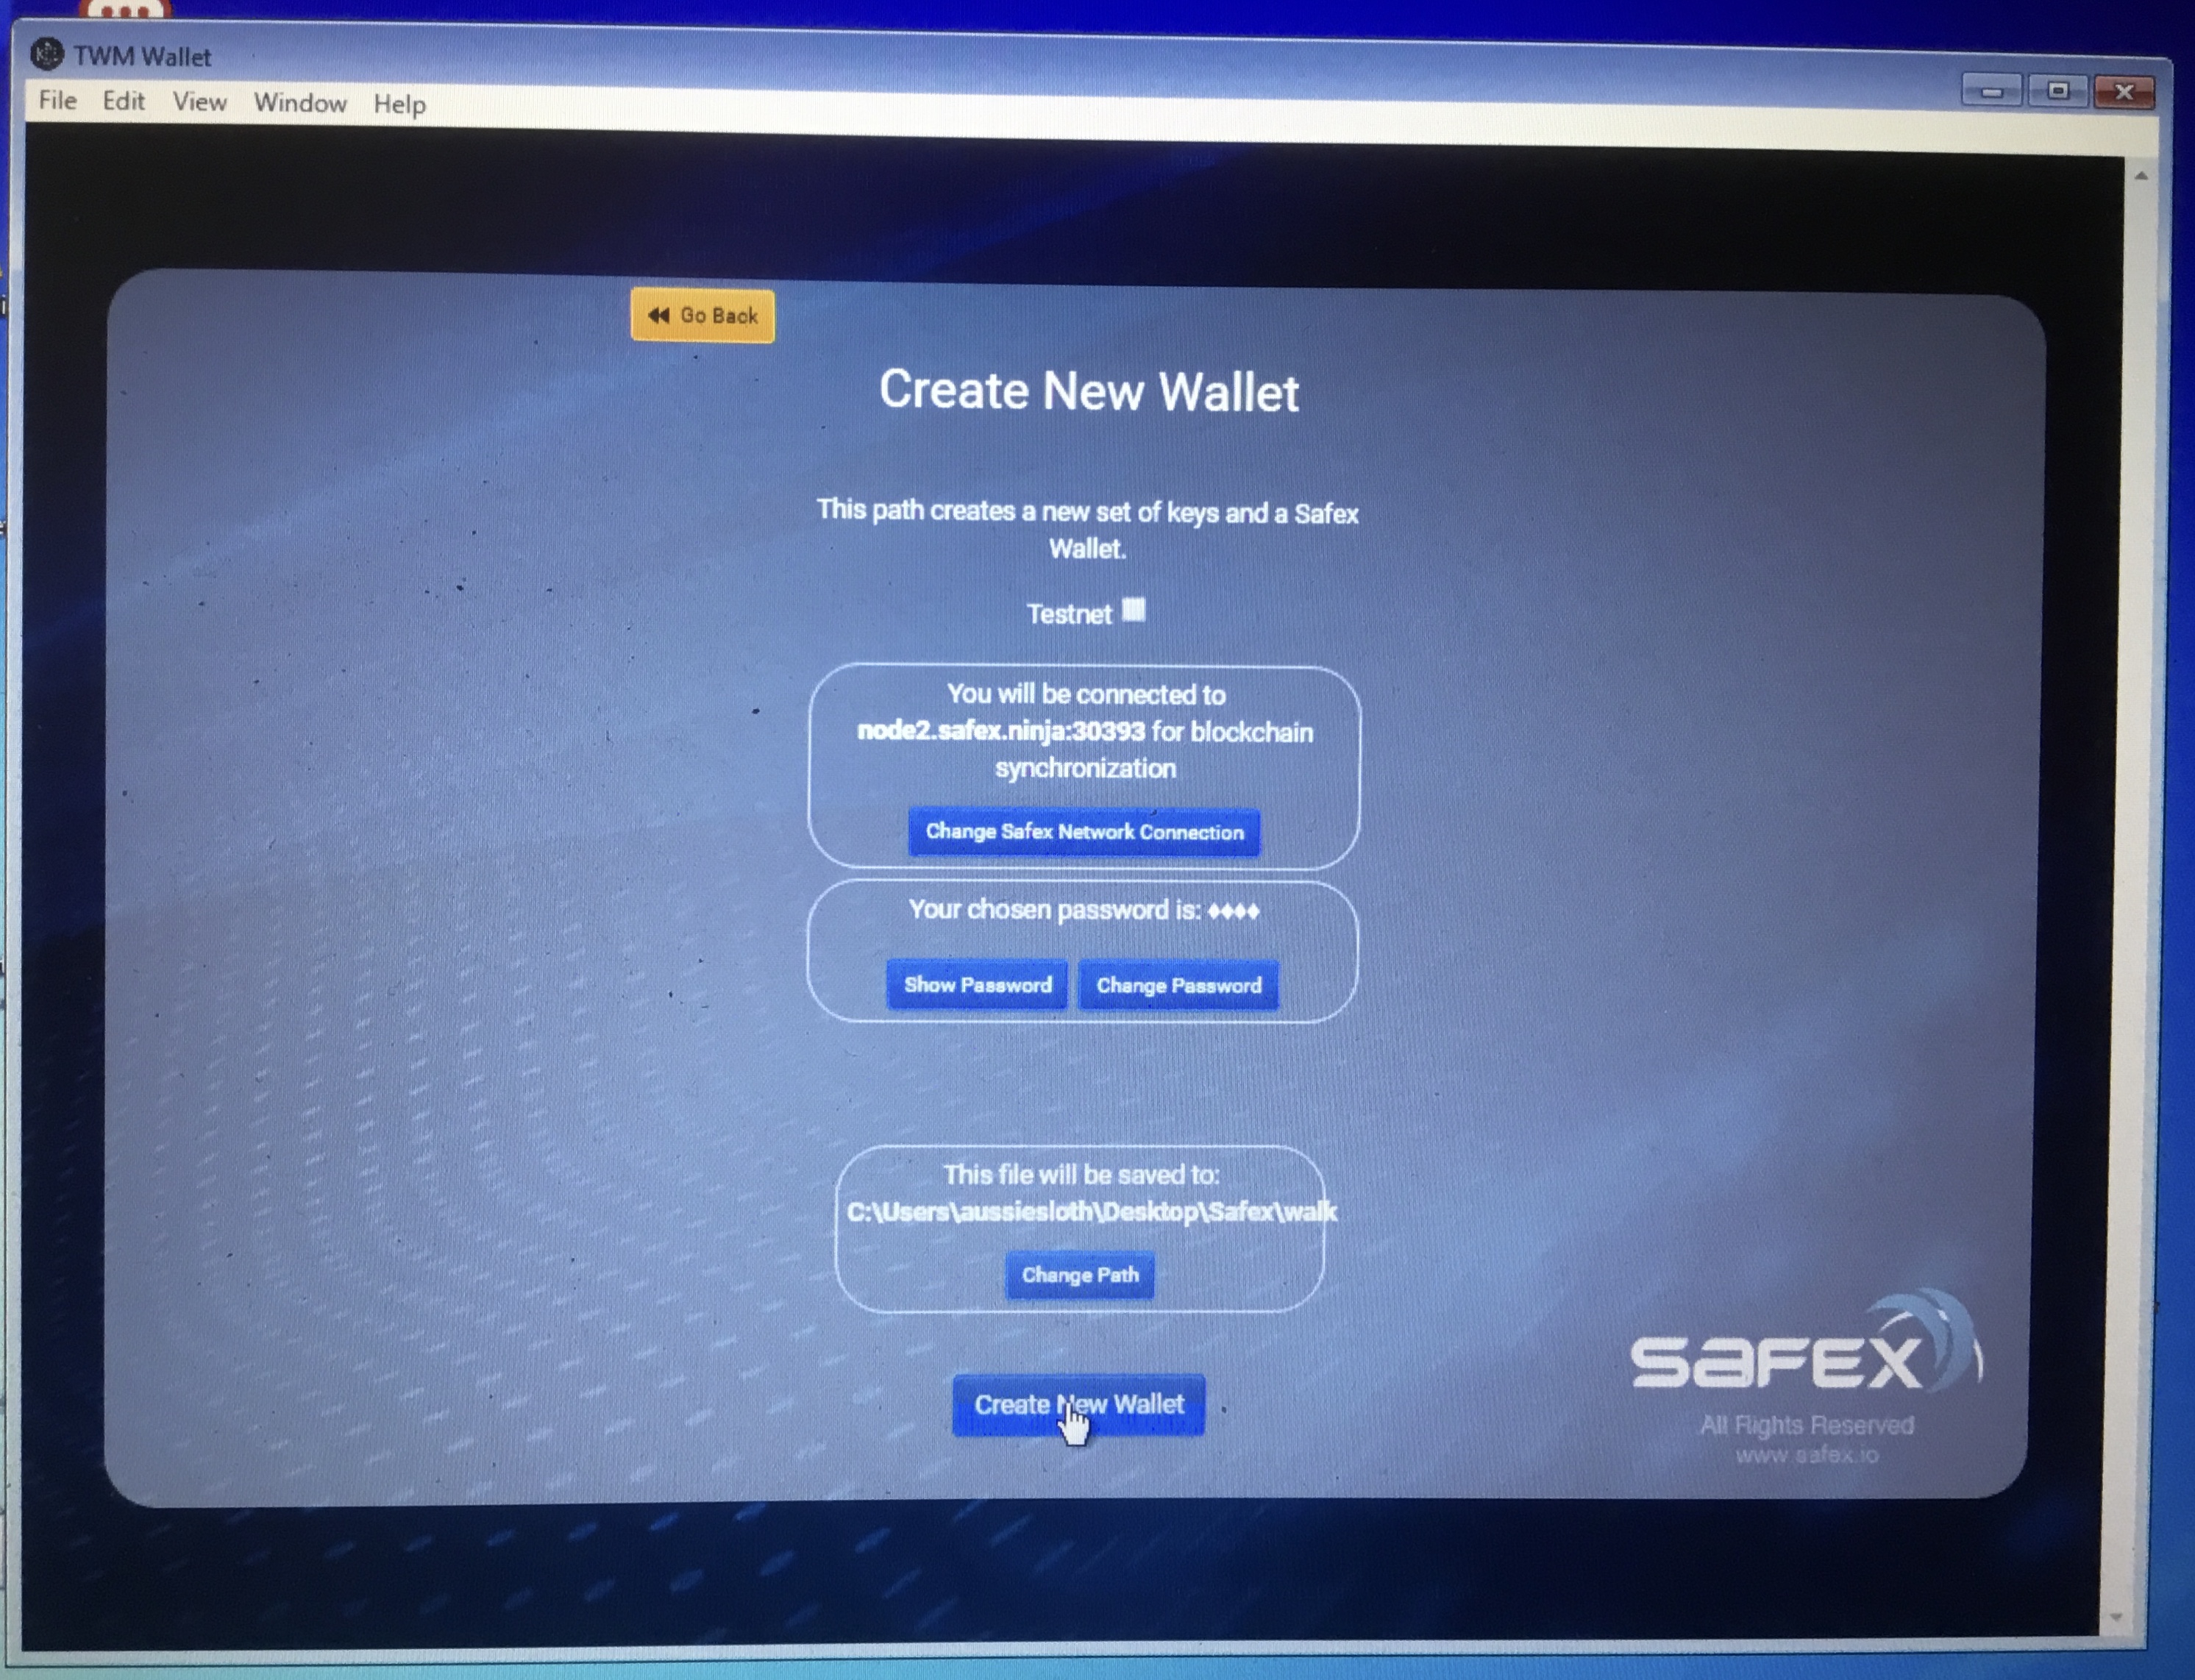
Congratulations. Your have created a stagenet wallet.
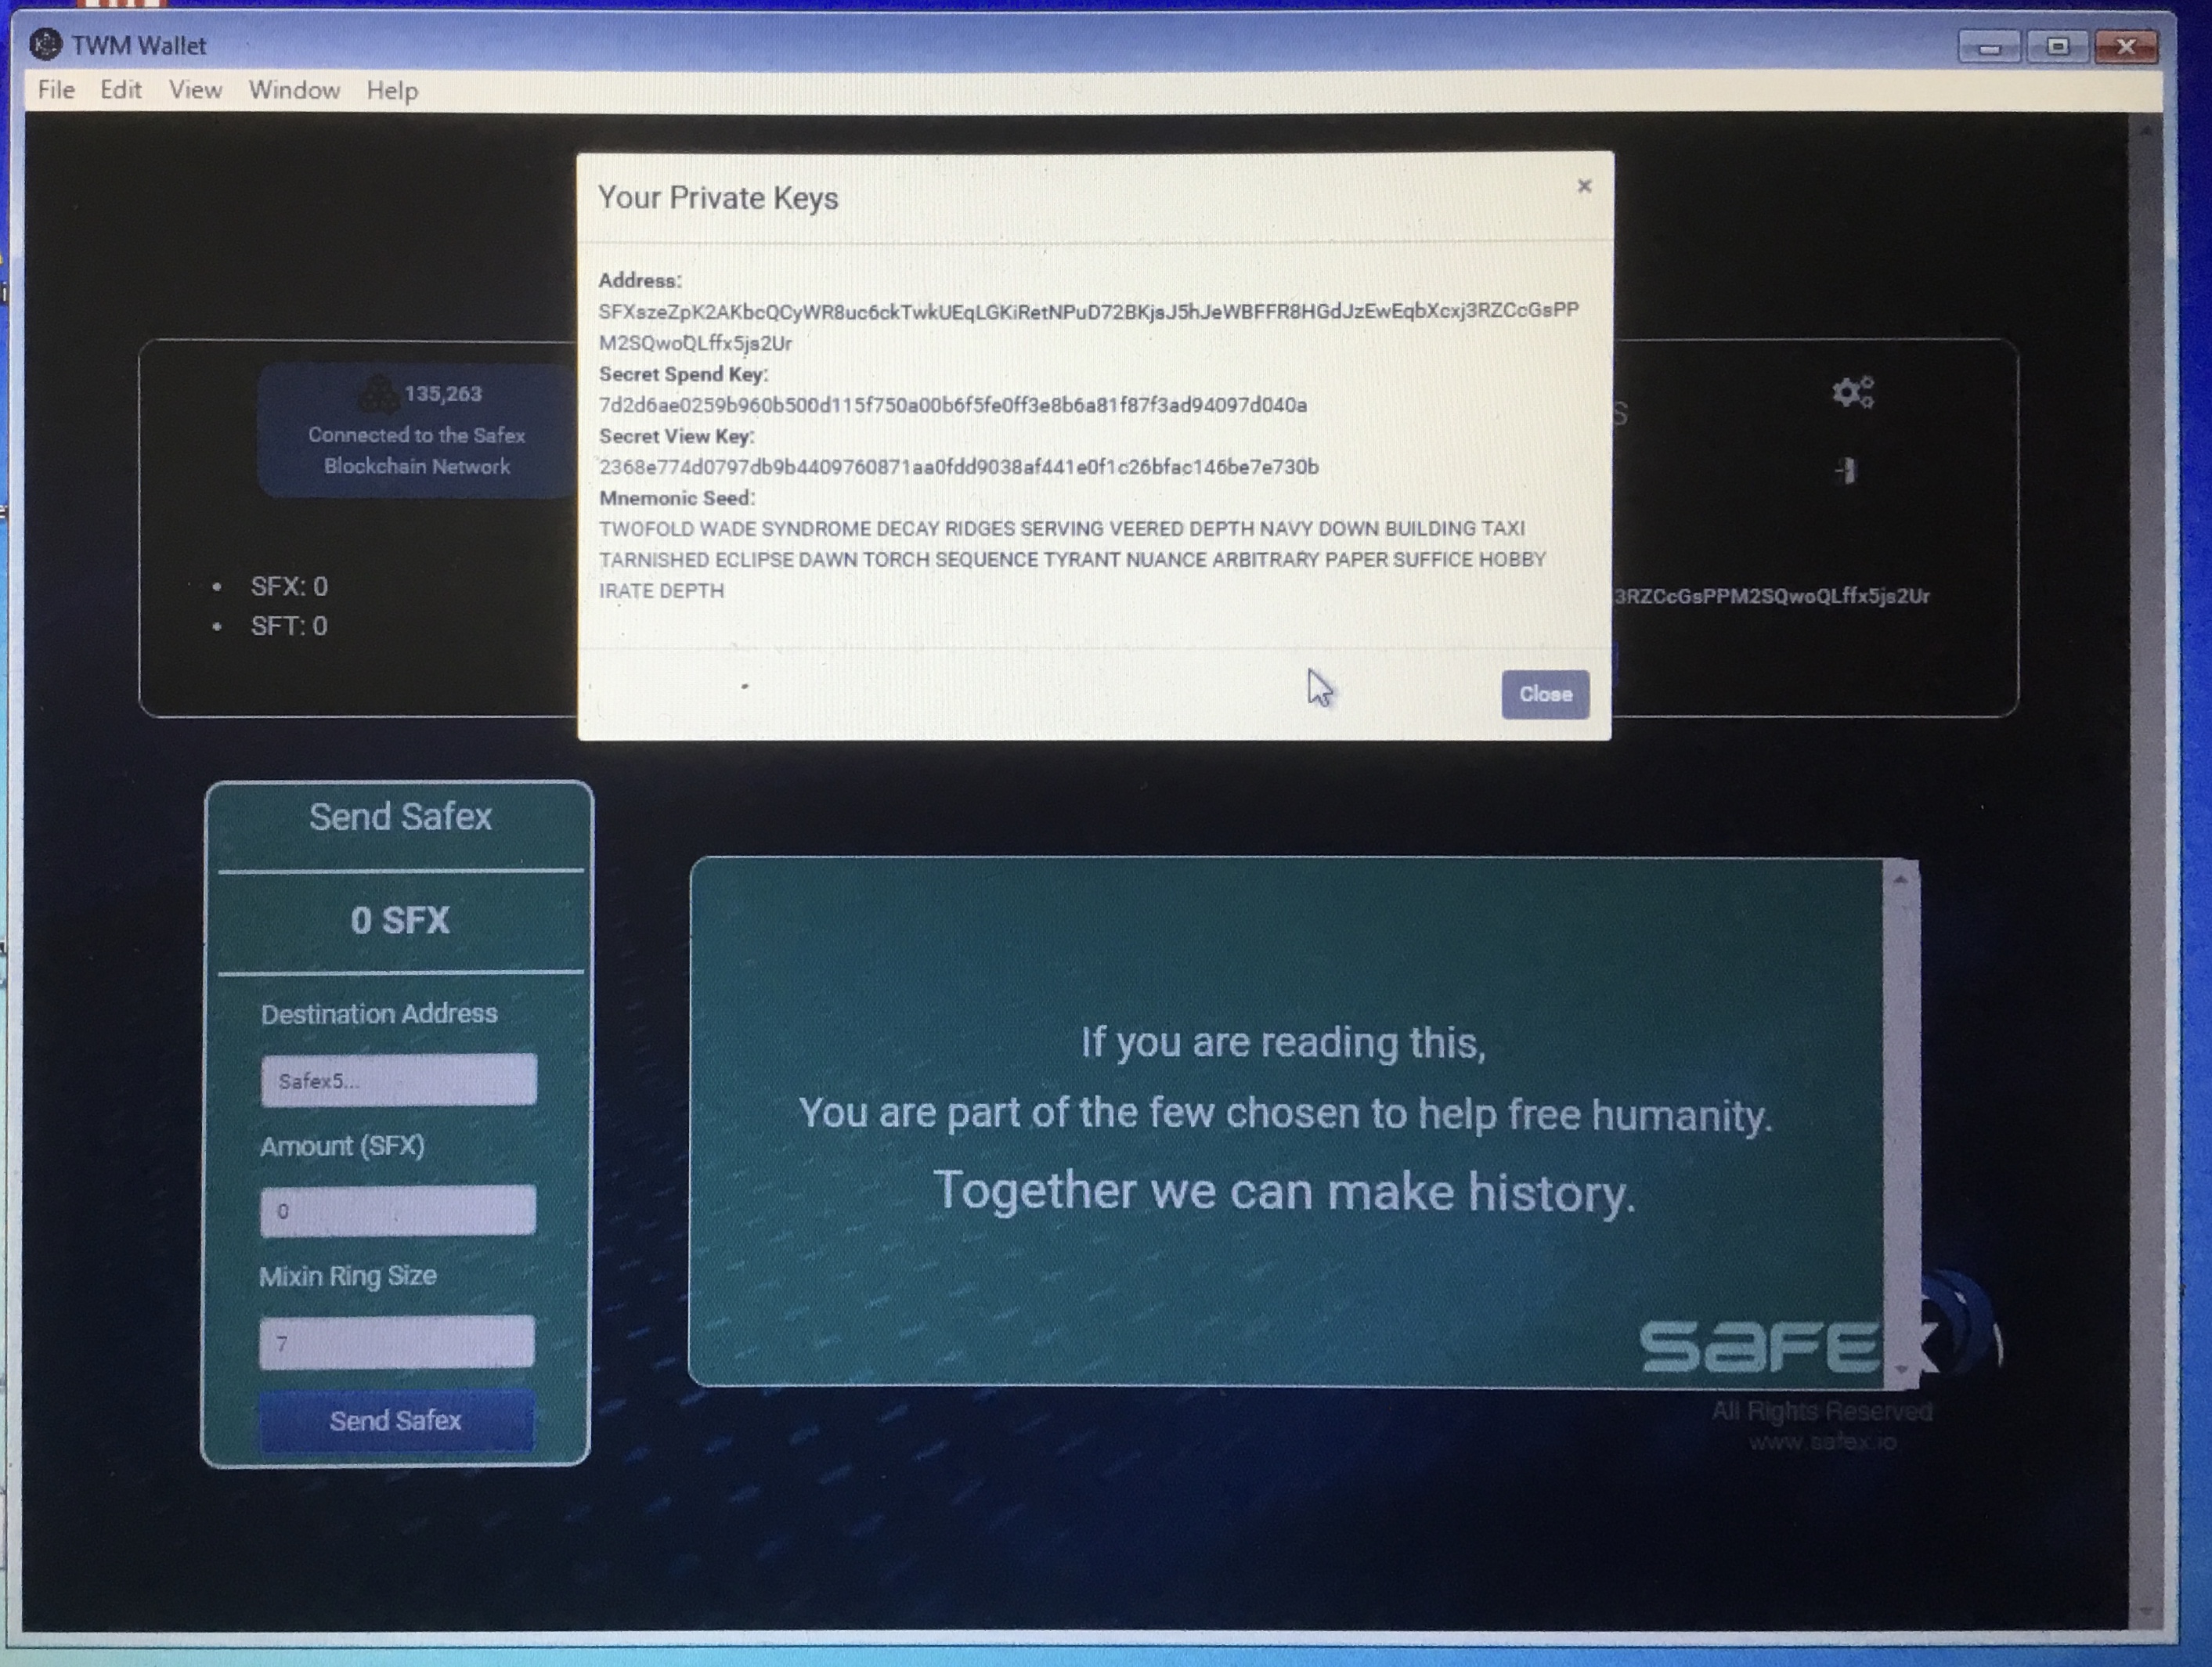
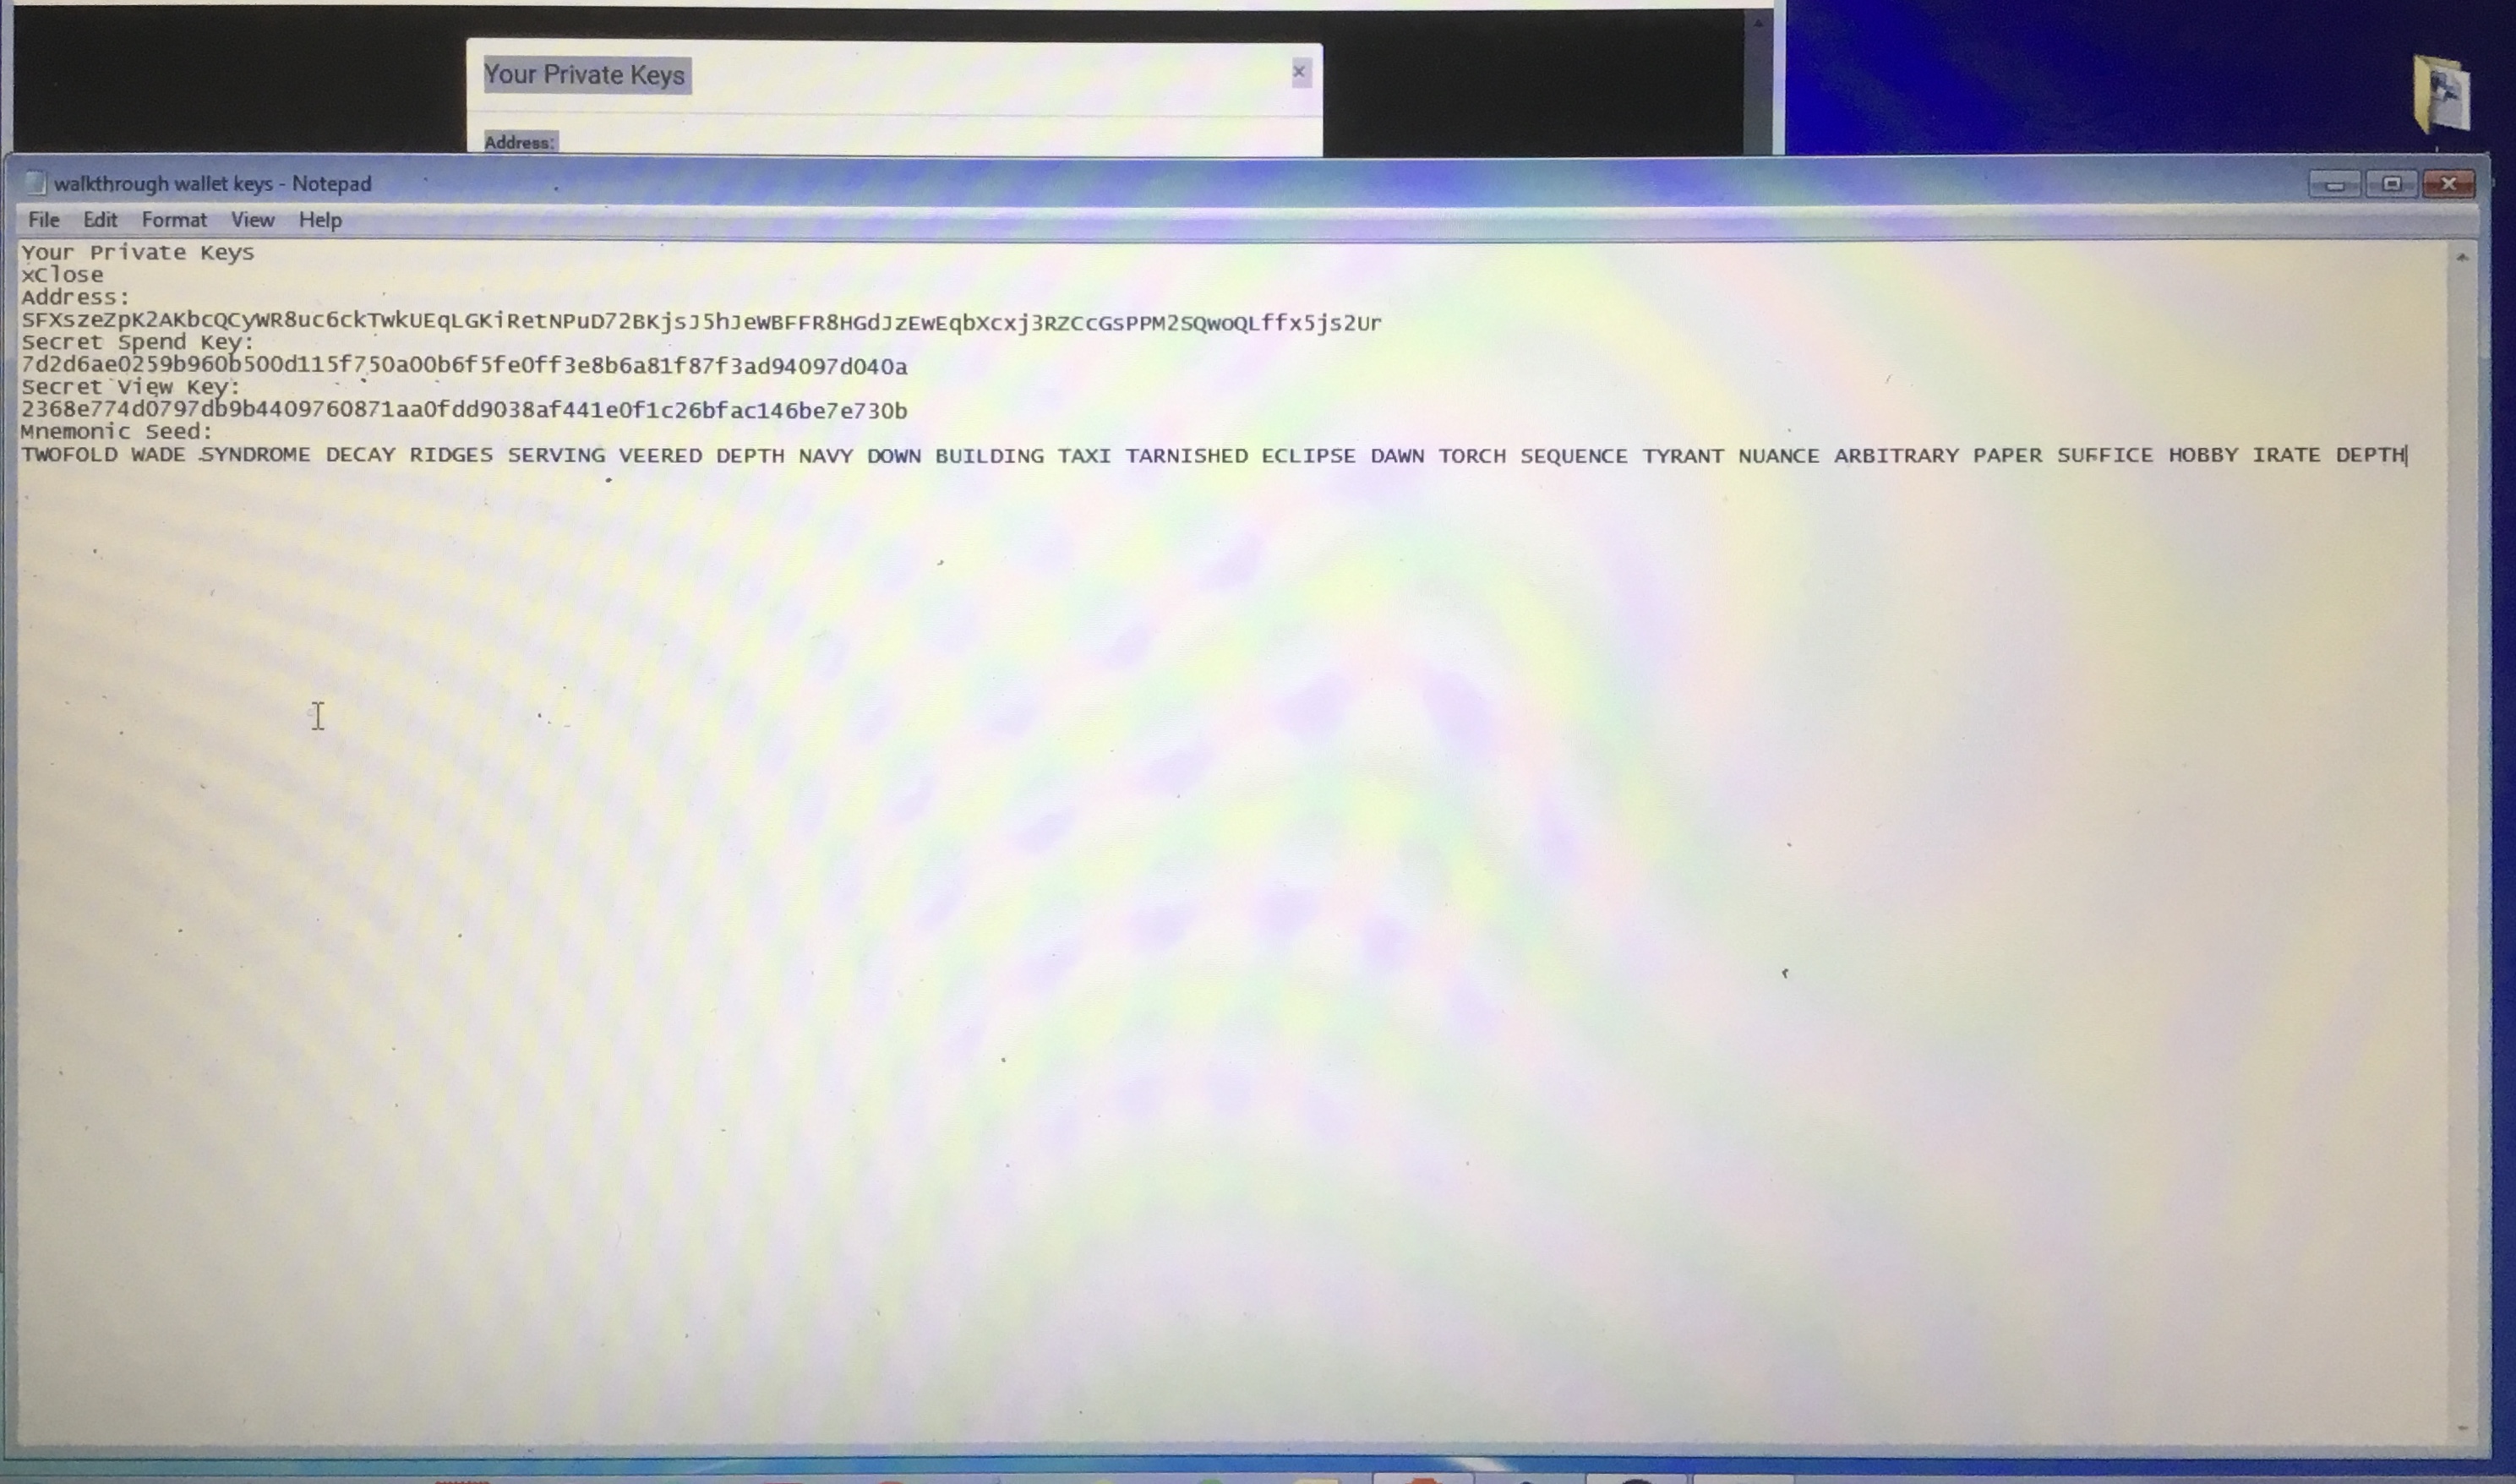
First thing you should do with any wallet is backup the address and Keys.
Click on the Show Keys button, copy the text in the popup, and paste into a text document. (With a Mainnet address, you would make several backups, printouts, etc and store them securely.)
Of course, with a Mainnet address, I would never drop a photo of the private keys and mnemonic seed into the forum. But with a test wallet that I’ll never use, it will remain empty and therefore safe to share.
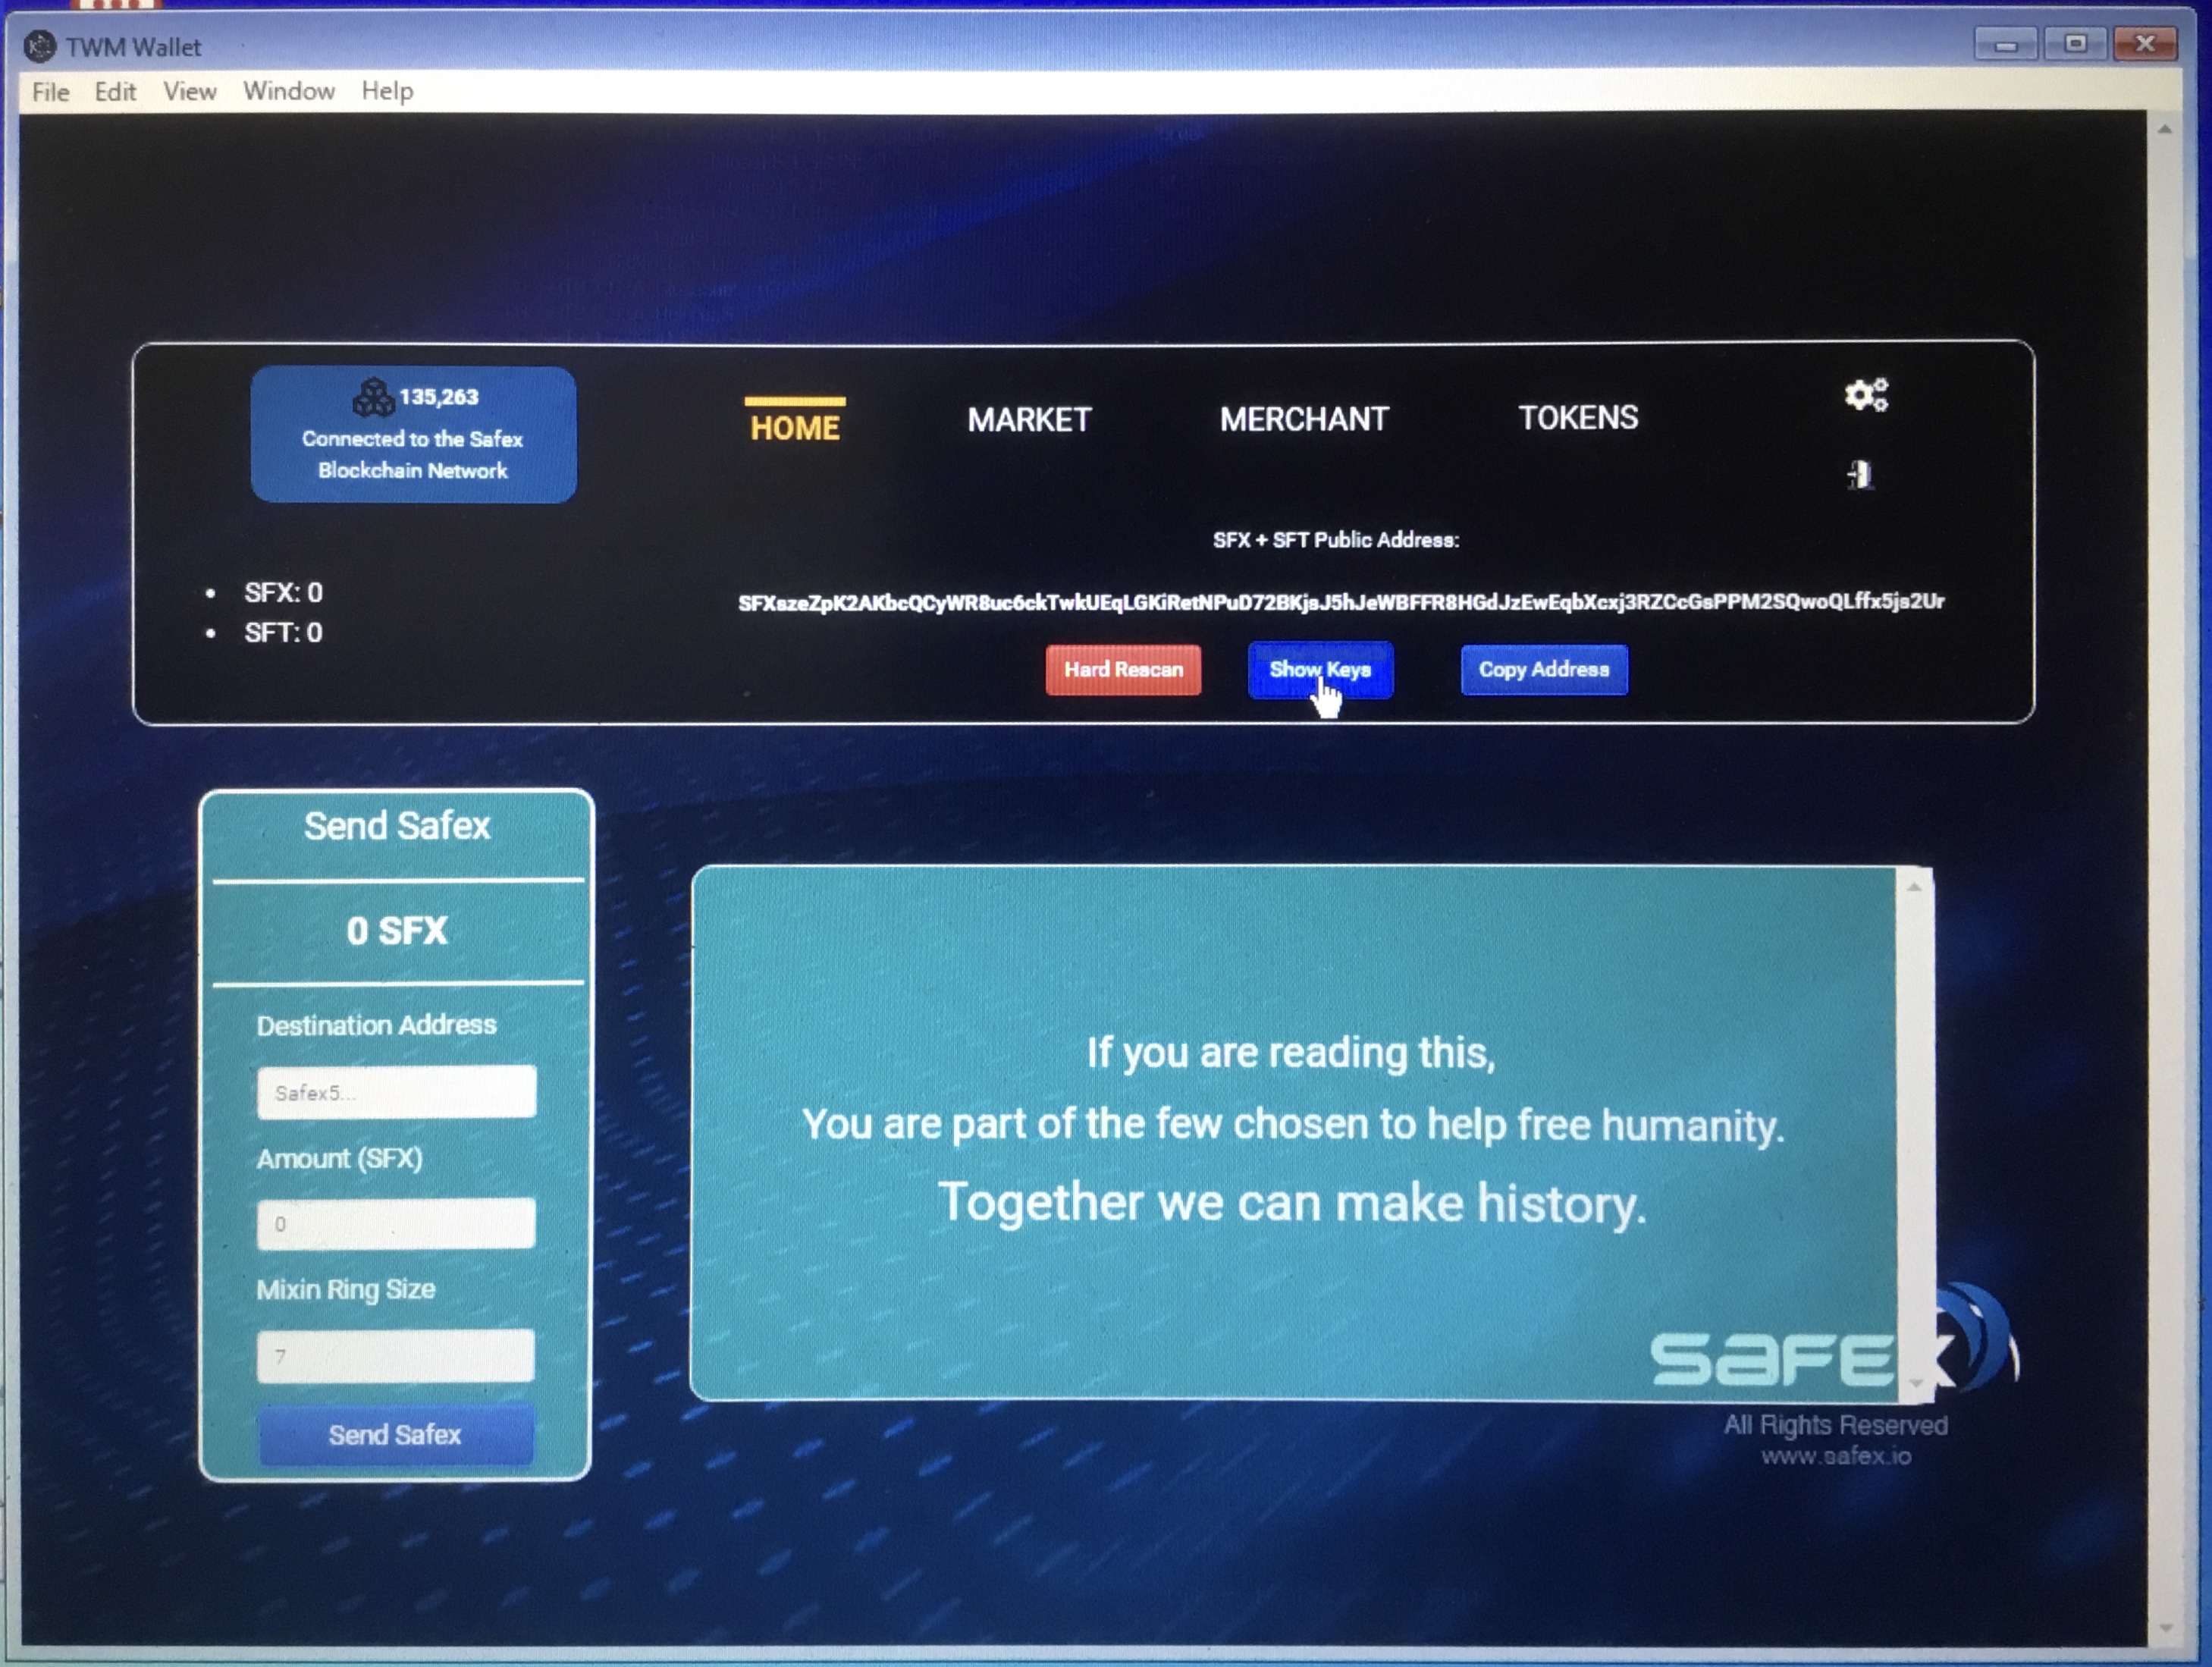
You can now Copy Address and ask for some stagenet coins for testing purposes… enjoy!!
When you go to reopen the wallet, you will note that 4 files were created…
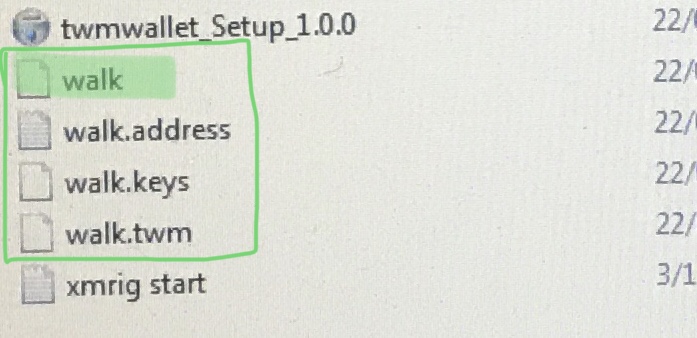
In this example, walk is the wallet file, and it is this file you should click on when you later reopen the wallet.
You may strike issues if you attempt to open the wallet with one of the other files.